by Ana Morlier
Unbe-leaf-able! Leaf Tips, Tricks, and Crafts
Hello readers and happy October! Isn’t it a re-leaf that the heat has subsided? It’s a re-leaf to walk outside and not have to worry about melting into the sidewalk. Puns aside, ‘tis the month for your yard’s minimalist phase, but instead of donating all the things it doesn’t need to Goodwill, you have to take care of it instead. Or, instead of dirty laundry, it’s…leaves, which smell much better in my opinion! To leaf or not to leaf behind, that is the question! Below are my tips on raking leaves, composting, and other disposal. Followed by the more, uh, fun topic of CRAFTS (where my biases lie; I’ve also been using the same autumn decorations, so these were a great way to spice things up, minus the pumpkin and cinnamon).
Raking Tips (take it, or leaf it!)
If you want a weight-leaf-ting workout, then be my guest and rake wet leaves.
If the ground is frozen, wait or use a leaf blower if you have it.
For faster compost rate, chop leaves up (with a rake, mower with grass catcher).
Wear eye protection and gloves (lots of loose organic matter).
Use smaller leaves for mulch in plant beds (or just use chopped-up leaves again).
Leaves can provide shelter for beneficial insects, so forming leaves in a donut shape around a plant is helpful to the plant and bugs.
Crafts (That’s my leaf-style)
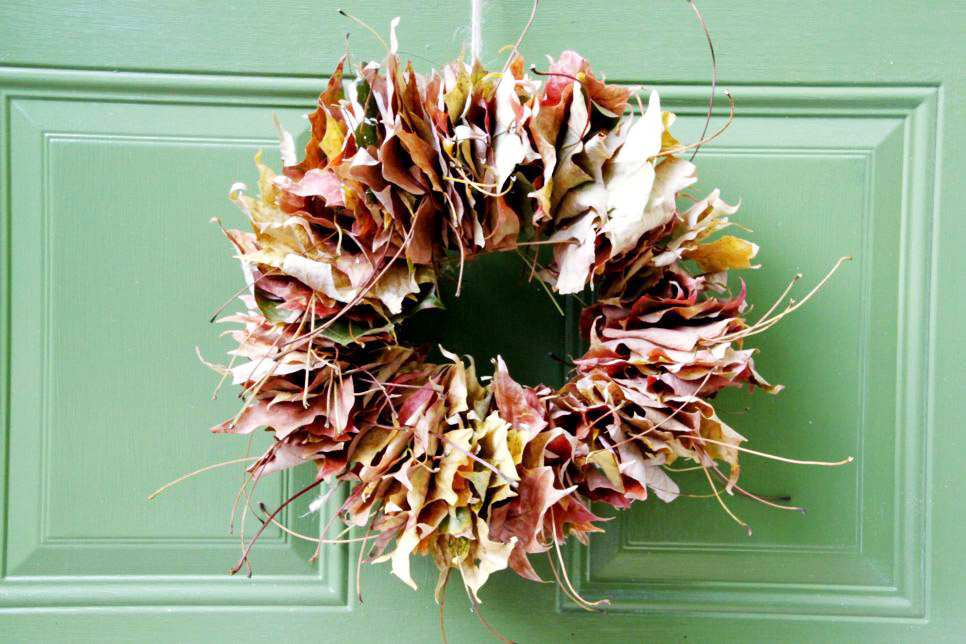
Organic Leaf Wreath (shown right)
Materials: Leaves, needle, and thread (yarns can be used if you want to make a garland), wire wreath frame, and twine.
Directions:
Thread your needle and thread at least an arms width apart (5 feet).
Thread leaf one, back facing the knot, in about the middle of the leaf (slightly close to the stem). The more gentle, the better!
Thread other leaves facing the same way (back of leaf in the same direction). Don’t push together too roughly, but they should be packed in tightly together!
Keep adding leaves to the string until a circle is formed (that fits your wire frame).
When the circle is finished, tie thread ends together.
Turn wreath around so that the stems eventually face outside of the circle (this gives your wreath more volume and a sense of movement).
Place on a wire wreath and tie twine in six areas spread evenly through the wreath. The twine will go between leaves.
Cut a large piece of twine to hang up your creation, and you’re done!
Ghost Leaves
Materials: Leaves, white acrylic paint, Sharpie or black paint, and paintbrushes.
Directions:
Coat leaves with white paint. Let dry.
Add eyes and a mouth with Sharpie (or black paint!) once the white paint has dried.
Optional: You can also use glitter paint for a fabulous ghost. For better results, paint a coat of glitter paint on top of the white coat of paint.
Leaf Goblins
Materials: Leaves, puffy paint, (optional googly eyes), glue (hot glue or other strong glue, or tape), Sharpie or black marker, white piece of paper (cardstock preferable), or other colors at the crafter’s preference.
Directions:
Simply hold a dried leaf and add puffy paint eyes, a spooky nose, a silly mouth, and other features. (Here you can glue on googly eyes if you wish!)
Let dry.
Then, glue or tape leaf to the piece of paper, and add arms and legs. Make a scene. (Tip: If you’ve chosen to tape on a black piece of paper, white chalk or crayons work better than colored pencil or paint).
“Spray Paint” Leaf Portraits
Materials: Leaves, masking tape, canvas/watercolor paper, spray bottle (the kind for watering plants), any kind of water, any kind of paint.
Directions:
Securely tape down leaves with masking tape to any size of paper or canvas you want to work with.
Fill up your spray bottle with a 1:1 ratio of paint to water. Then, spray on the surface—get creative with it!
Try different paint colors and ratios for various effects. Once the paint has dried, remove the leaves, and voila, you have a wonderful portrait!
Leaf Bowl
Materials: Air-dry clay, leaves, acrylic paint, sealer (Modge Podge or gloss), and a knife.
Directions:
Start by rolling out your air dry clay to match the area of your leaf- slightly bigger.
Press leaf firmly into the surface of the air-dry clay for 1-2 minutes, or until an imprint reveals itself.
Take the leaf out and cut around the imprint (get rid of excess air-dry clay).
Roll some of the outside edges slightly inward to give the perimeter some fun movement, but do not roll up the tip of the leaf.
Now it’s time to wait! Let the clay air-dry according to the instructions on the package. (Usually one day of drying per side, but it’s perfectly fine if it needs more time! You can’t rush perfection after all).
Now you can paint! Aim for 2-3 layers. Darker colors need fewer coats of paint, while lighter ones need more.
For extra gloss or sealant, use Modge Podge (waterproof if you want to use it like a dish but for non-food stuff).
Happy raking and crafting readers! Leaves are so versatile for many eco-friendly crafts, instead of using foam or other plastics. With natural colors, your crafts will stand out with a lovely scent, dramatic shading, and unique creativity in the best way. Stay cozy and enjoy! I be-leaf in you!