The Crazy Plant Lady
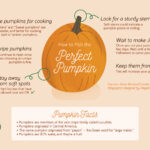
Picking the Perfect Pumpkin
by Ana Morlier
It’s time for the season of great family fun: Autumn! There are so many opportunities for great family-bonding time, whether it’s raking and playing in the leaves, making tasty sweets, or cozying up by the fire (or other heat source). However, the greatest fun of all lies in local farms and corn mazes! Endless outdoor activities, mazes, and fresh produce await anyone looking for more fall adventure—and the opportunity to pick a stellar pumpkin to kick off spooky October! However, finding the perfect pumpkin comes with its own tricky set of criteria for the healthiest or most visually appealing.
Tips & Tricks for Picking the Best Pumpkin
Ripe pumpkins come from vines that are slightly dried up. This also means the most vibrant color has been attained. If you cut a pumpkin from a green vine, it may be more dull or lose coloration. However, the pumpkin’s stem should not be dried up or mushy. A dark green coloration is suggested.
After choosing your pumpkin, cut from the vine, and not too close to the pumpkin.
Check for a hollow sound. You can do this by raising the pumpkin to your ear with one hand, and with the other, knock on any side of the pumpkin. The louder the hollow/echo sound present, the better the pumpkin is!
Hardened pumpkins are important for storage and longevity. You can test this by pressing your fingernails to the pumpkin’s flesh. If its skin or flesh cracks, it won’t last long and decay rather quickly. The skin should be somewhat leathery, but not give in when you push your nail in. Spongy or fleshy spots are not a good thing!
Checking for holes, bruises and soft spots is more important than you think, especially since these are easy entrances for bugs and fungal infections that can rot your pumpkin quickly! Please take extra care to check the bottom of the pumpkin, which is often missed and liked by bugs.
Dense pumpkins can be determined by their lack of or lesser hollow sound and relative heaviness compared to other pumpkins.
When walking around with your pumpkin, hold it by the base. Not only does it lower the risk of a very heavy object falling on your foot (ouch), but if the stem pops off (which it more than likely will if you are walking for a while and holding it by the stem), it leaves an open hole for bugs to get in or infections to occur.
When looking for cooking varieties of pumpkin, small pumpkins will be your best bet in texture, sweetness, and density. Dull-colored pumpkins are ok in this department (as the pumpkin flesh is still good). What isn’t ok are any dark bruises, wet spots (signs of frost), or holes.
Seeds are edible for all pumpkins! So, roast and enjoy.
If you don’t know what to look for in name for cooking pumpkins, some include: “Small sugar pumpkin, New England Pie Pumpkin, ‘Baby Pam’, ‘Autumn Gold’, and ‘Ghost Rider, Lumina, and crookneck squash/pumpkins’’ (Ianotti). Or, simply ask staff for their suggestions!
Handling Tips
Do not carve pumpkins that aren’t soft enough (aka, akin to carving wood). This is just a disaster waiting to happen with the uncontrolled misstep of any carving utensil. The exterior should protect the flesh inside but still be able to be carved with relative ease. For the easiest carving, lighter-colored pumpkins are your friend.
Balanced pumpkins are really important for your safety and presentation. To test that your pumpkin has even balance, rest your pumpkin down and closely examine your pumpkin if it tilts or falls in a way that can’t be corrected.
Carving size suggestions: Small pumpkins for traditional, easier patterns, medium pumpkins for stencils, and large pumpkins for intricate designs.
Preserving your pumpkin: The more open wounds on your pumpkin (aka from carving), the faster your pumpkin will rot. To prevent quick decay, place in any cool (not freezing), dry place until it’s showtime for your carving! When you display your work, place the pumpkin in a shady spot outside. Sunbeams can damage the color and cause it to rot faster.
You can also coat and then wash the pumpkin’s skin with a half cup of bleach to 4-4.5 cups of water (double if you run out).
While the list seems daunting, trust your instincts and other knowledge about the quality of produce to help you find the way to the perfect pumpkin. These are also mere suggestions. If cuts or abrasions go with the aesthetic you’re going for, pick that one! If you want a green pumpkin for a theme, that’s cool too! Shape, size, and color are all a matter of personal preference, ultimately. Handle these heavy plants with care (no broken appendages, please!) and carve carefully and AWAY from you (that goes to my younger, careless self). Now, get out there and pick some perfect pumpkins!
*Credit to Marie Iannotti of The Spruce, Viveka Neveln of Better Homes and Gardens, Farmers Almanac Staff and Maki Yazawa and Natalie Andelin of Well + Good.