DIY Natural Dyeing
by Ana Morlier
Happy summer, readers! Have you broken out the popsicles, yet? Or are you preoccupied with downcast, wilting plants that are (too) slowly adjusting to the summer heat? They’ll be fine…is what I tell myself. Really, all that matters is if the plant stays mostly green, right? Anyway, enough of my own gardener insecurities. It’s time for a fun experiment. The fourth of July and its consequential parties are rapidly approaching an otherwise (hopefully) wide-open summer schedule. Unless you’re the parent of a new driver, in which anxiety and bonding time intermingle with the family car. Though, hopefully, you are (alternatively) testing ties of friendship and family in friendly games of Mario Kart, now that you have the time. But beyond new drivers and errands, it’s time to spice up your regular summer checklist activities. No more store-bought T-shirt dye kits that hurt the environment. It’s time for creativity! Make your patriotic (or just for fun) dyed items all the better with your own natural, homemade dyes!
Materials for Mother-Nature-Grown Dyes
Red: Madder (Rubia Tinctorum) — This is undoubtedly a rather angry plant with thorny leaves, weed-like growth, and frustratingly extensive root systems. However, it has been used for centuries throughout the world for its alarming red color. Madder roots are used for dye, so buckle down and pull out one of its snake-like roots, wash it off any dirt, cut it into smaller pieces, and leave it in cool water before chopping for dye.
Pink: Goat willow (Salix Caprea) — A plant with mild softness perfect for those of us who long to stroke the uniquely soft fur of goats but have no space or are allergic. Despite its flowers possessing delicate white and yellow wisps, a pink dye can be created with the addition of bark.
Orange: Dyer’s Tickseed (Coreopsis Tinctoria) — And you thought I was making up the last one! I mean, Tickseed? With such beautiful blooms sporting purple, brown, and yellow all in one flower, it’s hard to understand the correlation between ticks and these flowers. Anyway, despite all of the previous colors I listed, this plant produces a rather vibrant orange dye. Even better, it’s native to North America, flowers for a long period of time, and is an amazing pollinator. The plant’s flowers are used specifically to make dye.
Yellow: Marigolds — In every article (it seems), I emphasize what an amazing plant this is for pests and pollination, so nothing more can be said. It’s also non-toxic, so still wear gloves but don’t fret if your skin comes in contact. The plant’s flowers are used specifically to make dye. Dyer’s Chamomile (Anthemis Tinctoria) — No, I did not add the “Dyer” part to make extra sure you’d believe chamomile can be used for dye. If you thought that was bad, there is a variety of marigolds called “sauce hollandaise” which is less vibrant, akin to hollandaise’s butter-colored sauce that… I’m not a huge fan of. The plant’s flowers are used specifically to make dye. Onions — (for rust coloration). Black Tea — (Rust/Beige/Charcoal).
Blue: Woad (Isatis Tinctoria) — Upon initial Google search, one might think this plant would be best at producing yellow dye due to the coloration of its blooms. But just like Indigofera, Woad’s leaves house a vibrant blue color. This plant requires a large radius to grow and is a European plant, so try to contain it in one area to prevent its invasion in your garden. Use only leaves for dye. Cornflower (Centaurea Cyanus) — For once, this produces a dye matching the color of its flowers: a blue-violet dye. Use flowers for dye, but save a couple for our avian friends, who love a tasty snack of seeds.
Now for making the dye! There are several different ways to go about this, so experiment with plants and material varieties to find vibrant colors. Always use gloves when working with plant materials and doing these processes. Dyes can be used for fabrics (such as shirts, tote bags, etc.), yarn, and fibrous materials. Even after dyeing, colors from natural dyes can fade quickly due to sun or wear and tear. However, it’s difficult to tell how materials will react to each plant dye, so you may have to experiment a bit to find the best dye and material combination. Finally, all dye methods should result in total color coverage.
Heat bath: Swish plant materials in a pot of water for two to four minutes. Then take out plant material and place in a boiling pot of water. Use about 1-2 cups of water, depending on how much dye you want (for example, 2 cups of water for a larger handful of plant material). Leftover plant fiber can be taken out, dried, and ground into powder. Clothing pieces can be placed in the leftover hot water, filled with dye until the color sets. Please use caution with the hot water! Alternatively, you can let water containing the pigment cool, then dye your items.
Steaming: First, soak the plant materials. After soaking, chop and place on the item you wish to dye. Be intentional; plant placement will determine the color and pattern that will result. Roll up clothing pieces to set plant materials in place, wrap them in plastic wrap, and put them in a steamer or over steaming water. Steam for 10-20 minutes and let cool before unwrapping.
Solar dyeing: Place clothing, fabrics, and even yarn in a jar of hot water with the plant you want the dye from. Add enough hot water to cover the fabric and plant material entirely in the jar. Put a lid on and set in the sun. Timing (of how long to “steep” the dye and material in the sun) will depend on your own judgment. Try for an initial hour, then check the jar. If it appears that the fabric has absorbed color or the pigment has diffused, your material dyed should be ready!
And there you have it! For simplicity’s sake and consistent dye shade, I recommend the last dyeing option. There are certainly better explanations and visual guides given by the website and YouTube channel, Textile Indie. Check it out! Finally, have patience, as it takes trial and error to discover the complexities of the dyes and the best dying process for you, but also have fun! After all, you can say that you’re a potion master as you create amazing and unique items.
You got this, readers!
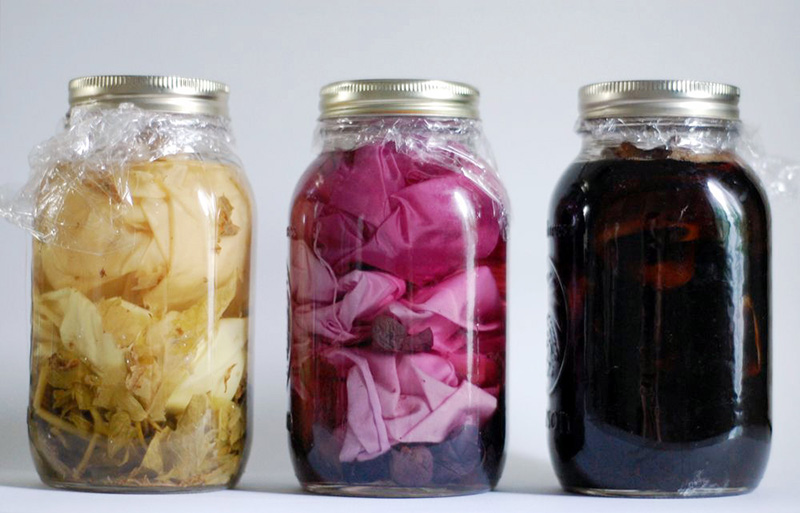
Pictured are completed solar dyeing jars.
Credit to: Natasha Goodfellow and Lottie Delamain of Gardening Etc, and the Textile Indie.
Image Credit to Natalie Stopka on Pinterest