Currently viewing the tag: "Culinary Arts Creations"

by Ava Morlier, Culinary Arts Writer

Tired of the basic BBQ sauce to flavor your cut of meat? Dry rubs drying out your food? Try making today’s recipe: a marinade! Though it is an extra step to flavoring your preferred cut of meat, marinades are useful for more than just flavoring meat. Marinades act as great tenderizers, cut down on cooking time, and ensure the cut of meat is juicy. How do marinades work? Well, a basic marinade consists of three parts: acid/enzymes, oil, and seasonings. Acids and enzymes do most of the heavy lifting when it comes to breaking down your meat so that it’s tender. Acids cause the proteins within the meat to unwind, causing the meat to become more tender. However, acid is very strong, so when making a marinade with an acid (like the one in the recipe below), make sure to marinate the meat for less time (or use an oil to slow down the process). You can use citrus juices, vinegars, and even alcohol to get the job done.

Unlike acids, enzymes break down the proteins in meat to tenderize. This means that it takes less time to tenderize the meat. Just be careful about how long you let your meat tenderize in an enzyme-based reaction: it can turn your meat into jelly!

Where can you find such enzymes? The main enzyme, protease, can be found in a variety of fruits (mainly raw pineapple, honeydew melon, kiwi, figs, and papaya). You can also use yogurt or buttermilk to break down your cut of meat. The combination of low acidity, enzymes, and fat make a fantastic element to any marinade (with the low acidity meaning the marinade isn’t as harsh, and the natural incorporation of fat giving the meat flavor).

Now, for the second part: oil/fat. Fat gives the marinade flavor and prevents it from sticking to a cooking surface. Any type can be used: canola, olive, or peanut; or use other sources of fat: mayonnaise, margarine (like today’s recipe), or buttermilk.

Finally, the seasonings. Though the fat does provide some flavor, seasonings finish off the marinade with spice. Use any dry spice or herb desired. Need to incorporate salt? Use a salt-infused liquid, like Worcestershire sauce or soy sauce. Using liquid allows the meat to become juicer; the use of dry salt will dry out your cut of meat. You can also incorporate an element of sweetness into the meat with the use of honey, maple syrup, or molasses.

Want to make your own marinade? Keep in mind to use one part acid or enzymes to three parts oil, plus seasonings.

How should you marinate your meat? Primarily, use one cup of marinade to one pound of meat. Make sure to completely submerge the meat in the marinade, and let marinate in the refrigerator in a non-reactive sealable container (such as a plastic container or zip-top bag). Want to make sure the marinade penetrates every inch of the meat? Pound the meat with a meat tenderizer or meat mallet so that it is nice and thin. The thin meat means more surface area to penetrate.

Not all meat is equal! Marinade times differ depending on the meat. Fish requires about 30 minutes to marinate (thanks to its thin shape), while pork and chicken can take anywhere from 2 hours (for acid based marinades) to 12 hours, and beef and lamb can take anywhere from 3-24 hours. Confusing? Feel free to use a recipe to marinate your preferred cut of meat; it will provide guidance for the best time to marinate based on ingredients and meat used.

Don’t just stop at meat to use marinades. Marinate vegetables for a flavor pick-me-up! Today’s marinade recipe utilizes vinegar for acid (as well as a delicious tangy flavor), margarine for fat, and a combination of spices for flavor (hot sauce for a kick of spiciness, Worcestershire for salt, and black pepper and garlic salt for spice-based flavor). Enjoy the tangy and spicy flavors of this marinade (or have fun making your own)!

Hot & Tangy Chicken Marinade

Ingredients

⅔ cup water

⅔ cup white wine vinegar

1 tbsp. black pepper

2 tbsp. garlic salt

2 tbsp. Worcestershire sauce

1 tbsp. hot sauce

3 tbsp. margarine or butter, melted

4 (10 ounce) bone-in chicken breast halves

Tools Needed

Dry and liquid measuring utensils, spoon, large zip-top plastic bag or plastic sealable container.

Instructions

Combine water, vinegar, pepper, salt, Worcestershire sauce, hot sauce, and butter in a zip-top plastic bag or plastic sealable container. Shake to mix well.

Add chicken, seal well, and place on the bottom-most compartment of the refrigerator for 4 hours.

Take out and set aside. Discard liquid. Grill, bake or saute until the middle is no longer pink and serve!

*With credit to Marinade information credit to the articles “How to Marinate Meat, Chicken, Seafood and Vegetables” by Carl Hanson and the allrecipes editors on allrecipes.com and “The Science of Marinades” by Catherine Hu on discovermagazine.com; recipe credit to Wendy Shirley’s Vinegar Grilled Chicken recipe on allrecipes.com.


by Ava Morlier, Culinary Arts Writer

Happy July! Need a cold, sweet drink to fight the heat? Try today’s recipe: the Key Lime Soda!

A drink enjoyed by the Vietnamese, this beverage captures all the delicious flavors of a key lime pie, all in one sip. Condensed milk and pasteurized egg yolk (used to thicken the beverage) give the drink a thick and creamy base, while cold club soda gives a bubbly airness to the drink. Finally, the drink is finished off with the sweet and tangy flavor of the namesake, lime. Though much different than your basic lemonade, this drink will satisfy your taste buds with every sip, thanks to the myriad of different flavors.

Enjoy this cold drink alone, with friends, or for those under 21 (it’s alcohol-free!) and beat the sweltering summer heat deliciously!

Key Lime Soda

Ingredients

1 pasteurized egg yolk

⅓ c. sweetened condensed milk

½ tsp. salt

1 c. cold club soda (or enough to fill the glass)

2 tbsp. lime juice

½ c. ice (or enough to fill the glass to the rim)

1 lime, thinly sliced

Tools Needed

Dry and liquid measuring utensils, tall glass, and whisk

Instructions

In the glass, combine the egg yolk, condensed milk, and salt. Whisk until smooth.

Once smooth, pour the club soda into the glass until the liquid reaches half an inch from the rim, stirring vigorously as the soda is poured. Once poured, stir liquid until both components are well combined.

Add the lime juice and mix well; add ice until the liquid reaches the rim of the cup.

Garnish with a slice of lime and serve immediately.

*Note: if the drink sits out for a long time, it may have a curdled appearance. This is normal and the drink is still safe to consume.

*With credit to Incredible Egg and the American Egg Board’s Egg Foundations course on Rouxbe.com

by Ava Morlier, Culinary Arts Writer

Happy May! Memorial Day is this month, and grill lids across the nation are opening in ode to both the sacrifice of soldiers and the culinary opportunities expanded by the warm weather. Today’s recipe also pays tribute to grilling season: Gourmet Bacon Cheeseburgers!

Yes, today’s delicious handheld sounds typical of any cookout. You’re probably wondering why waste my time with this when I could just buy some burger patties at the store? Well, this recipe lives up to its name of gourmet with the integration of some uncommonly used ingredients. First, this burger is seasoned with onion soup mix. Sound strange? Onion soup mix provides a great boost of concentrated flavor and will bring out the flavor of the shallots (sounds fancier than simple slices of onions, right?). Confused over why to put a slight dent in the middle of the patty? Pressing down the middle ensures the middle gets completely cooked. It also ensures that the patty has a uniform height when cooked. No strange-shaped burgers here; your hand-shaped burgers will look as good as the store’s by doing this extra step. As for the other ingredients: the shallots help bring out the onion flavors of the patty, while also providing a slightly sweet flavor to the burger as a whole (thanks to the caramelized nature of the shallots). The bacon will provide an extra savory and deliciously fatty element to the burger.

Enjoy your Memorial day safely and deliciously!

Gourmet Bacon Cheeseburger

Ingredients

5 oz. ground beef

1 tsp. onion soup mix (add more if preferred)

1 slice cheese

Oil

1 slice bacon

1 large shallot

1 bun

Instructions

Start a medium pan on low heat (and preheat oven to 3500 if toasting buns). Start grill, if using. In a bowl, combine the beef and onion soup mix (with gloved hands). Once well combined, shape into patties; press a thumb into the center. Stack patties on top of each other, take off gloves, wash hands, cover and put in the refrigerator for later use.

In the medium pan, cook the bacon, flipping after 2 minutes. Place on a bed of paper towels; cut into 3 pieces with a knife and set aside (keep pan on low heat).

On a cutting board, thinly cut the shallots. In the same pan the bacon was cooked in, caramelize the shallots, cooking until shallots are soft and browned. Set aside once cooked.

In a skillet (or on the grill), place burger patties with one pair of tongs. Cook to desired doneness per side. Flip using the same pairs of tongs. Once both sides are done, use a clean pair of tongs to place the burgers on a clean plate.

Toast the buns: Place buns on a sheet pan (or on the grill) and cook until toasted, 3-5 minutes. Take out and set aside.

Layer the burger: On a clean plate, put down the bottom bun. Place the burger on top of the bun. Then, place the shallots and bacon; place cheese on top of both. Put the burger in the oven to melt the cheese for 10-15 seconds (or until melted; can microwave the burger to melt the cheese, too); place the top of the bun on top and serve.

*Note: add lettuce, tomato, or other preferred fixings after cheese has been melted.

Tools Needed

Gloves (optional), bowl, knife, cutting board, medium pan, spatula, plate with bed of paper towels, knife, sheet pan (if toasting the bun in the oven), skillet or grill (for cooking the burger), food thermometer 2 pairs of tongs, medium plate (for serving).

*With credit to Chef Liddick of CTC; Burger information credit to Traeger’s Grilling the Perfect Burger chart, Delish’s “How Do You Like Your Burger Cooked?” infographic, and Tyler Lachance’s “Ultimate Burger Guide” infographic on cookoutexpert.com

by Ava Morlier, Culinary Arts Writer

Happy April! Today’s recipe makes an elegant (but delicious) accompaniment to your Easter feast: Blueberry Strudel.

Sweet and savory, the blueberry strudel is a great way to invite spring to your table. Blueberries bring bright and sweet notes of flavor, while the delicate layers of phyllo dough wrapping up the sweet filling provide an element of delicious savoriness (and makes the pastry an easy handheld).

Today’s strudel isn’t rolled like a traditional strudel. Instead, it is folded into triangles for elegance and to ensure the filling is well wrapped within the phyllo. Phyllo dough is very delicate. Rips are bound to happen (and that’s okay!). If it rips, sandwich the broken sheet between two unbroken sheets. The triangle will still fold just as well. Too many ripped sheets? All good! Make crackers by brushing the sheet with butter, placing another piece on top, and repeat until the desired thickness is reached. Sprinkle seasonings between layers and on top, bake until golden brown, let cool, and serve. Your mistakes will make a delicious snack! Enjoy the delicious flavors of this pastry, and may it help you have a sweet Easter!

Blueberry Strudel

Ingredients

3 cups fresh (or frozen) blueberries

¼ cup granulated sugar

2 tbsp. cornstarch

1 pinch of salt

5 tbsp. unsalted butter, melted

½ lb. phyllo dough, thawed

cinnamon sugar, for sprinkling

Instructions

Make the filling: Start a medium saucepan on medium-high heat. In the saucepan, mix together the blueberries, sugar, cornstarch, and salt, and bring to a boil. Turn down the heat to medium-low and let simmer for 3 to 4 minutes.

Once done, pour into a bowl and let cool until room temperature.

Preheat the oven to 4000. Line a baking sheet with parchment paper and set aside. Melt the butter in a small bowl.

Fold the strudel: On a clean workspace, unroll phyllo dough gently. Cut into 3-by-11-inch strips and stack. Cover the stack with a wet paper towel to ensure that it doesn’t dry out (the wet paper towels may need replacing as you work the phyllo dough).

Gently peel a sheet from the stack and place it with the long side nearest to you. Evenly brush butter on the entire surface.

Add another layer of phyllo dough on top of the first, so it covers the first sheet, and brush with butter.

Lay a final sheet of phyllo dough on top of the first two sheets.

Spoon a small amount of blueberry filling 1 inch away from the left edge of the pastry.

Fold the top left corner of the rectangle to the bottom over the filling so that it creates a triangle. Brush the rest of the sheet with butter and continue folding so that the strudel resembles a triangle.

Place on a baking sheet lined with parchment paper. Cover with a wet paper towel. Repeat until filling runs out.

Take wet paper towels off the folded triangles and brush with butter. Sprinkle cinnamon sugar over the tops of the strudels. Cut a small vent into the tops of the strudel with a knife. Place the sheet in the oven and bake until golden brown, about 15-20 minutes.

Take out of the oven and place strudels on a cooling rack. Let cool for 20 minutes and serve.

Tools Needed

Medium saucepan, dry measuring utensils, medium bowl, small bowl and pastry brush (for brushing butter), wet paper towels (to cover phyllo dough), medium baking sheet, parchment paper, cooling rack.

*With credit to Claire Robison’s Blueberry Strudels recipe on foodnetwork.com

by Ava Morlier, Culinary Arts Writer

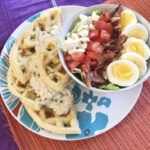
Happy March! Today’s dish is a gourmet take on a classic breakfast (or dinner) pairing: chicken and waffles! Chicken and waffles are the ultimate any-time-of-the-day meal (with the waffle providing carbohydrate-fueled energy and the chicken satisfying your stomach with protein).

While most chicken and waffle dishes involve fried chicken and waffles, today’s recipe uses a chicken gravy instead. Why? Gravy’s liquidy nature allows the savory flavor to easily spread across all of the textured surface of the waffle, similar to how syrup coats a regular waffle. No need to transition from taking a bite of fried chicken to a bite of waffle; using gravy allows you to get all the flavor in one bite.

Another way this dish is gourmet? The waffles themselves! Waffles are a great blank canvas in terms of flavor. Though the common notion is that waffles have to be savory and buttery or sweet, one can flavor waffles however they like. Case in point: these Parmesan-herb waffles. No longer buttery and bland (and not dependent on syrup to sweeten things up), these waffles take center stage with their rich, cheesy, and herby flavor. Impress family and friends alike with this delicious spin on a tried-and-true classic and satisfy everyone’s taste buds with the rich and savory flavors. Enjoy!

Chicken Gravy & Parmesan-Herb Waffles

Ingredients

Waffles:

2 cups white flour

1½ tsp. baking powder

1 tsp. baking soda

1 tsp. sugar

1 tsp. salt

1 tsp. black pepper

2 large eggs

1 tsp. dry parsley (or 2 tsp. fresh chopped parsley)

2 cups buttermilk

5 tbsp. unsalted butter, melted or cooled

¾ cups grated Parmesan cheese

Oil for greasing the waffle iron

Gravy:

3 tbsp. unsalted butter

3 tbsp. white flour

2½ cups milk (2% or whole; if using whole milk, omit 1 tbsp. flour)

½ tsp. garlic salt (can use more or less to taste)

½ tsp. black pepper

½ c. cooked chicken, shredded

Instructions

Preheat the waffle iron on the medium heat setting.

Make the waffle batter: In a large bowl, combine the flour, baking powder, baking soda, sugar, parsley, salt and black pepper, mixing with a spoon until ingredients are well incorporated. Set aside. In a small bowl, add eggs and beat together. Add buttermilk and butter; mix until well combined. Pour the mixture into the large bowl and mix until the batter is smooth. Mix in Parmesan cheese; put batter in the refrigerator for later use.

Make the chicken gravy: Start a medium saucepan on medium heat. Once warm, add butter and melt. Whisk in flour and let cook 1-2 minutes (in order to cook out the flour flavor). Add in milk and spices and whisk mixture until smooth. Let cook 1-2 minutes or until thickened. Stir in chicken; set aside (if gravy is too thick, add milk and stir).

Cook the waffles: Once the waffle iron is heated, take the batter out of the refrigerator. Get tongs and plate out and set to the side of the waffle iron. Open and grease the iron; pour batter into the middle of the waffle iron with the ⅓ cup, pouring in just enough batter to fill the waffle iron (not too much). Close the waffle iron and let cook 6-8 minutes, or until the waffle is golden brown. Once cooked, open the waffle iron, take out the waffle with tongs, and put on the plate. Repeat with the remaining batter.

Assemble the dish: On a serving plate, place cooked waffles. Pour on chicken gravy, garnish with parsley, and serve.

Tools Needed

Dry and liquid measuring utensils, large bowl, medium bowl, spoon, whisk, medium saucepan, whisk or fork, waffle iron, tongs, ⅓ cup, plate.

by Ava Morlier, Culinary Arts Writer

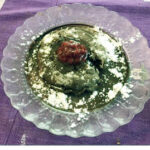
Happy February! Today’s recipe pays homage to the sweet and chocolatey flavors (and gooey love) of Valentine’s Day: chocolate lava cake! Relatively easy to make (a quick bake so you can get back to your date in no time with an impressive dessert to share), deliciously gooey, and great for sharing, the chocolate lava cake is the perfect Valentine’s Day food. It even contains the mess: unlike a messy chocolate fondue, the gooey chocolate is contained by the deliciously rich outside of the cake, allowing you to save yourself from an embarrassing mess. This cake includes relatively little flour, meaning that one can really taste the bittersweet chocolate (and it allows the cake to be much more lava-like). Worried about how the batter is gooey in the middle? Don’t fret! The high temperature of the oven kills off any pathogens, allowing the batter in the middle to be enjoyed safely. Want to boost the cake even further? Try using different garnishes! Some ideas could include crushed almonds (providing a savory and crunchy contrast to the sweet and gooey cake), sliced strawberries (adding a pop of romantic red color and tangy bite to the flavor profile), raspberry drizzle (adding elegance and sweetness), caramel drizzle, or even a peanut butter drizzle for the peanut butter chocolate lover in your life. This cake can also be served powdered with confectioner’s sugar or alongside a cold scoop of vanilla ice cream. Enjoy your Valentine’s Day delightfully with this heavenly cake, whether with a loved one or by yourself!

Chocolate Lava Cake

Ingredients

½ stick of butter at room temperature

3 oz. chocolate chips

1 egg at room temperature

1 egg yolk at room temperature

½ tsp. vanilla extract

½ pinch salt

2 tbsp. sugar

1 tbsp. flour

1 tsp. butter & 1 tsp. flour, for greasing

Instructions

Preheat oven to 4500. In a medium pot, fill a little less than halfway with water and set to boil. Get out a heatproof bowl that can rest in the pot without touching the water.

Put chocolate chips and butter in the bowl and put the bowl over the boiling water. Stir until mixture is smooth. Set aside.

In a different bowl, beat together egg and egg yolk until frothy. Add sugar and beat well until incorporated.

Add vanilla and salt; then add flour in small amounts at a time, mixing well after each addition.

With a spatula, fold chocolate mixture into batter. Fold until all ingredients are well combined.

Take out ramekins or ceramic dish. Grease with butter and dust with a pinch of flour.

Fill ramekins/dishes with batter until they are ⅔ full. Place dishes on small sheet pan and place in the oven.

Bake 8-11 minutes, or until a toothpick inserted into the edge of the cake comes out clean (the top of the cake should develop air pockets).

Once baked, take out and let sit one minute. Slide a knife around the edges of the cake with a serrated knife. Put a plate over the mouth of the ramekin/dish, then flip lava cake onto the plate, holding the hot dish with a potholder. The lava cake should come out of the dish and onto the plate; lift the dish off the cake with a knife.

Garnish and serve.

Tools Needed

Solid and liquid measuring utensils, heat-proof bowl, spatula, regular bowl, beaters and mixer, spoon, medium pot, medium ramekin or small round ceramic dish (mugs work), small sheet pan, toothpick, serrated knife, plate, table knife.

My own lava cake, topped with a strawberry compote (for a chocolatey, fruity flavor) and powdered sugar (for an element of sweet vanilla contrast).

*With credit to Chef Liddick of CTC

by Ava Morlier, Culinary Arts Writer

Happy January! Missing the sweet flavors of Christmas? Need something to wake you up during these dark and frigid mornings? Try whipping up a Vietnamese egg coffee!

Warm, strong, and delicious, this drink is surprisingly easy to make (you’ll feel like a barista!) and perfect to fight off the January chill.

This strong bitter coffee will keep you going through the day, while the sweet and airy egg cream that tops the coffee (made thick with pasteurized egg yolk) will quell your cravings for pastries of Christmases past. Have leftover pastries from the holidays? Serve them alongside this drink for a cafe worthy meal.

May the sweet egg cream satisfy your taste buds and the warm coffee help you beat the January cold!

Vietnamese-Style Egg Coffee

Ingredients (makes one drink)

1 large pasteurized egg yolk

2 tbsp. condensed milk

½ c. strong, hot coffee

Cinnamon, for dusting

Tools Needed

Bowl, mixer and whisk attachments, spoon, liquid measuring utensils, small narrow glass (ex. tall coffee cup)

Instructions

Make the egg cream: In a bowl, combine egg yolk and condensed milk. Beat together with the whisk attachment for 4-6 minutes, or until think, airy, and creamy. Set aside.

Pour hot coffee into the glass until liquid is a half an inch from the rim.

Spoon on or pour the egg cream mixture on top of the coffee, filling the cup to the top.

Evenly sprinkle cinnamon over the top of the egg cream and serve.

Enjoy!

*With credit to User Yoly’s Vietnamese Egg Coffee on allrecipes.com; image credit to User Michele on steves-kitchen.com

by Ava Morlier, Culinary Arts Writer

Happy December! I’m sure you’re swamped with cookie and dessert recipes, so today’s article will give you information to munch on (rather than burdening you with another Christmas cookie recipe).

Ever wonder what happens to your cookie while it’s in the oven? Sure, you mix ingredients in the bowl and all that, but why those ingredients? How does your cookie become a cookie in the span of half an hour?

Well, it’s the ingredients in the cookie dough reacting to each other, and those reactions are initiated by the heat of the oven. Curious? Check out the timeline below to see how your cookie transforms from wet and malleable to dry and crisp!

Cookies

A Delicious Timeline of How Your Cookies Transform in the Oven

Ingredients

A delicious timeline of how your cookies transform in the oven:

You’ve just whipped up a fresh batch of cookies. You’ve done everything right: You’ve creamed the unsoftened butter with the sugars, added in the rest of the wet ingredients, then finally added all the dry ingredients and mixed well. Why is there such an involved process to make the dough? Adding all the ingredients at once will lead to inconsistent texture; the sugar retains the moisture of the butter, allowing the cookies to develop air pockets throughout the dough. Not creaming the sugar with the butter directly will result in a cookie that will grow upwards rather than spread out.

Now you’re sliding the batch into the preheated oven (not preheating the oven will result in cookies that break apart) and waiting for the wet dough to transform. As the dough cooks, it takes on its full cookie glory!

920-The once semi-solid butter melts, causing the cookie to spread out (giving the cookie its novel round shape). Water is released from the butter and turns into steam within the cookie.

1360– Salmonella (once alive in the egg) dies off, making your cookies safe to eat.

1440– The proteins from the eggs unfold, connect with other proteins and refold, making the egg (and the shape of the cookie) less runny and more solid.

2120– The steam boils away and evaporates, causing the shape of the cookie to solidify and the surface of the cookie to become cracked and dry.

Additionally, air pockets are formed in the cookie (giving it airy flakiness) thanks to the reaction of acid and baking soda forming carbon dioxide gas-filled air pockets.

3100-The Maillard Reaction takes place: Proteins from the egg and sugar break down and relink together, forming structural proteins that give cookies their distinctive golden-brown color. This linking process also results in the development of flavor and aroma (that delicious smell that lets everyone know something good is baking in the oven!). The scent also signifies that your cookies are done! Taking them out as soon as that sweet smell hits your nose results in deliciously chewy (and not overcooked/tough) cookies!

3560-The sugars in the cookie break down, giving the cookie a sweet and nutty flavor (and a darker brown color).

After the mouthwatering scent of the cookies hits your nose, you take the cookies out and let them cool on a cooling rack (making sure to take them off the cookie sheet soon after they have been taken out of the oven; the hot pan may overcook or burn the bottoms of the cookies, as it has retained heat from the oven). And just like that, your cookies have been transformed!

Enjoy munching on this knowledge as you wait for your signature Christmas cookies to cook! Happy baking and Merry Christmas!

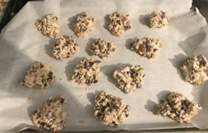
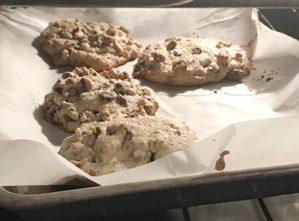
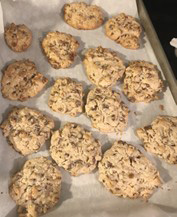
The cookies start out…

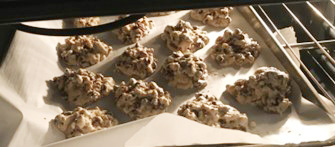
The cookies begin to spread…

The cookies dry out and solidify…

The finished cookies!

by Ava Morlier, Culinary Arts Writer

Happy October! These increasingly cold temperatures call for warm, hearty dishes to satisfy both the body and the soul. Today’s dish will provide just that with its creamy, savory flavors: Gourmet Mac n’ Cheese! A few techniques in this recipe may seem a little strange, but they give an added depth of flavor. Here’s an explanation of a few of them. While it may seem odd to steep the half-n-half with shallot and clove, this step will provide an extra flavorful component to the Béchamel sauce (a cheesy, rich sauce that will coat the noodles). Adding breadcrumbs to the top of the dish provides a deliciously crunchy contrast to the soft and gooey texture of the Mac n’ Cheese. Finally, the recipe involves parboiling the pasta and shocking it. Cooking the pasta until a little bit before al dente will prevent the noodles from being overcooked in the oven. Shocking the pasta (putting the pasta in a strainer that is then placed in an ice bath) will effectively stop the cooking process and allow the noodles to finish cooking in the oven.

Though it seems much harder than cracking open a cardboard box of Kraft, this Gourmet Mac n’ Cheese recipe will be sure to warm your body and satisfy your taste buds with its richness and depth of flavor. Enjoy!

Gourmet Mac N’ Cheese

Ingredients

2 c. pasta (mini shells or penne)

4-6 c. water

Ice water

2 shallots

1 whole clove

2 c. half-and-half (can use regular milk if needed)

2 tbsp. butter

2 tbsp. flour

4 slices American cheese

½ c. cheddar cheese

1 c. gruyere cheese

1 c. fontina cheese

2 c. panko breadcrumbs

Note: reserve a handful of the assorted shredded cheeses for the top

Instructions

Preheat oven to 3500. Start boiling water: bring 4-6 c. water to a boil in a large pot. Be sure to salt the water. Once it has reached boiling point, add pasta and allow to cook for 5 minutes. While it is cooking, prepare an ice bath (fill a large bowl halfway with ice and cold water).

Once the pasta has finished cooking (and pasta still has a slight bite/firmness to it), strain with a colander and place in the ice bath. The pasta should be fully immersed in the water. Add oil to the pasta and allow it to sit for 5-10 minutes. Once time is up, lift the colander from the ice water (making sure all water is drained) and place pasta in a bowl. Oil well.

Prepare the Béchamel sauce: in a medium pot, combine half-and-half, whole clove and shallot. Allow to steep 10 minutes or less on low heat. Can be slightly steamy but should not boil. Once it has steeped, remove the shallot and clove and set aside (you can either drain the liquid through a fine mesh sieve, or you can get them out with a spoon).

Start a separate pot with tall sides on medium-low heat. Add butter and allow to melt. Finely mince shallot and add to the pan.

Cook the shallots on medium low heat, making sure they don’t develop any color (about 2-3 minutes). Set shallots aside for later use.

Make the roux: In the same pan, add 2 tbsp. butter and allow to melt. Once melted, add flour and whisk well. Allow roux to cook for about 2 minutes, or until the roux develops a nutty smell. The roux should be bubbly.

Add the shallots back in. If half-and-half is done, add to the roux. Mix well with a metal whisk until roux is well combined with the half-and-half.

Add in cheese: starting with the American cheese, add cheese to the mixture in small portions, mixing well after each addition. Make sure to mix immediately after each addition of cheese so that the cheese doesn’t sink to the bottom and burn.

Once all the cheese is added (the mixture should be quite thick), add pasta to the mixture. Fold in gently. Once the Béchamel sauce has been fully incorporated into the pasta, add to a well-greased casserole dish. Smooth out the top with a spatula.

Add breadcrumbs and reserved handful of cheese to the top evenly. Put in the oven and allow to bake until the breadcrumbs are light brown and the cheese is bubbly, about 20-25 minutes (if you’re pressed for time, set the heat to broil and cook for less than a minute, or until the breadcrumbs are browned).

Take out and allow to cool for at least 5 minutes. Dish and serve.

by Ava Morlier, Culinary Arts Writer

Happy September! Fall is a wonderful season. High summer temperatures have abated, the harvest provides a plethora of delicious vegetables, and the changing leaves render the mountains covered in beautiful hues of amber, gold, and scarlet. Today’s dish incorporates the fruits of the harvest, elements of color, and delicious flavor all in one place: frittatas! An Italian take on the traditional omelette, the frittata is a baked egg dish that (similar to an omelette) can have a multitude of fillings. However, the frittata is different from the basic omelette. It is much thicker (at least 1-2 inches thick) and requires a different cooking process (the egg is poured onto the filling, mixed, and agitated/slightly scrambled to develop texture, then finished in the oven). Sounds hard? The frittata is much easier to make than a french-style omelette, thanks to its thickness (no folding needed!). Once done, simply cut and serve. Enjoy this flavorful frittata!

Herby Vegetable Frittata

Ingredients

6 large eggs

6 leaves of fresh basil

¼ tsp. salt

¼ tsp. black pepper

1 tbsp. olive oil

1 tbsp. garlic, minced

½ lb. yellow squash

½ lb. zucchini

6 oz. red bell peppers

4 oz. cremini mushrooms

½ c. green onion

3 oz. goat cheese, crumbled

Instructions

Preheat broiler. Wash vegetables; measure out spices, oil, and cheese (respectively). Set aside.

Chiffonade-cut the basil: on a cutting board, place leaves of basil on top of one another. Once stacked, roll the bottom of the leaves to the top (making a small roll). Make thin, vertical slices on the log (should result in thin strips of basil). Set aside.

Roughly chop the parsley. Set aside

Cut the pepper: Cut out the top of the pepper, remove stem and seeds; cut the pepper into four sections. Stack the sections on top of each other and cut vertical, thin strips from the stack.

Cut the zucchini and squash: Cut the stem from the squash; cut in half lengthwise down the middle. Place the flat side of one half on the cutting board; cut thin pieces from the half (creating thin half circles). Repeat with the remaining squash; repeat the process with zucchini. Set aside.

Prepare the rest of the vegetables: peel and mince the garlic; thinly slice the green onion; thinly slice the mushrooms. Set aside.

Heat pan on medium heat. In a bowl, beat together eggs, basil, parsley, salt and pepper; put in the refrigerator for later use.

Cook the vegetables: pour oil in the pan and swirl to coat. Put squash, zucchini, peppers, mushrooms, and green onions in the pan; toss to coat in oil and let cook (making sure the vegetables are evenly distributed across the pan). Let cook until tender, about 4-8 minutes.

Stir in garlic and let cook for 30 seconds.

Pour egg mixture into the pan; mix with vegetables and gently agitate the eggs (scraping the sides of the pan and the middle for about a minute. Let cook 3-4 minutes, or until eggs are firm (but wet).

Evenly sprinkle goat cheese on top (making sure the entire surface is covered) and place in the oven (making sure the pan is 5-7 inches away from the broiler). Let cook until golden brown and firm throughout (about a minute).

Take out and let sit for 5 minutes. Cut and serve.

Tools Needed

Dry measuring utensils, several knives, several cutting boards, small bowls (for holding cut vegetables), medium bowl, medium oven-proof pan, spatula, knife, plate (for serving)

*With credit to The American Egg Board’s Vegetable Frittata Recipe on incredibleegg.org.

by Ava Morlier, Culinary Arts Writer

Happy August! Feeling bored and want a gourmet dish to try? Try making today’s recipe: crepes! Simple, easy to customize, and delicious, crepes are a favorite of many. They can be sweet or savory, allowing them to be enjoyed by many for both mealtimes and desserts. Savory crepes marry together salty goat cheese, tangy tomatoes, and herby basil in the filling to create a rich, well-balanced flavor in the crepe. The addition of a balsamic vinegar drizzle (if preferred) can help introduce a sweet and tangy flavor, further enhancing the flavor of the tomato. Impress friends and family alike with this world-renowned favorite. Enjoy making (and eating) these savory crepes!

Savory Crepes

Ingredients

For the Crepes:

2 large eggs

¾ c. milk

½ c. water

1 c. all-purpose flour

3 tbsp. melted butter

¼ tsp. salt

fresh basil

For the Filling:

1 oz. room-temperature goat cheese

1 tomato, thinly sliced

1 tbsp. minced fresh basil leaves

garnish (optional)

– fresh basil leaves

– balsamic vinegar

Instructions

In a blender, combine the ingredients of the savory crêpes. Blend 7-10 seconds on high.

Put in fridge and let chill for 1 hour

Meanwhile, set out goat cheese in order to allow it to reach room temperature. On a cutting board, cut tomato into very thin slices with a serrated knife. Working on the other side of the cutting board, thinly cut the basil leaves (you can also shred the basil by hand to save on dishes). Once finished, put the tomatoes and basil in the refrigerator for later use.

Make the crêpes: On the stovetop, set a medium-sized skillet on medium heat. Add butter to coat the skillet when the skillet is warm.

Pour ¼ c. batter onto the middle of the skillet. Swirl batter around the skillet so it coats the entire surface of the skillet. Continue moving the batter until the crêpe is thick.

Set the skillet on the burner and let cook. Flip the crêpe when the edges of the crêpe curl inward. Once flipped, let cook for 10 seconds, then set on a plate. Place a paper towel on top, then cook the next crêpe. Repeat until all of the batter is used. Note: The first crêpe will not turn out well, and that is okay!

Once the crêpes are done, begin assembling the savory crêpe: spread room-temperature goat cheese across the surface of the crêpe with a butter knife. Put tomato slices on half of the crêpe and sprinkle on basil. Fold the crêpe in half, putting the top over the tomatoes. Take the top edge of the crêpe and fold over to make a triangle. Continue to fold over to make 1 large layered triangle. Cook folded crêpe in the skillet until lightly browned, 1-2 minutes per side.  Garnish as desired, drizzling on balsamic vinegar, if using, or sprinkle on fresh basil. Serve.

Tools Needed

Dry and liquid measuring utensils, blender, medium non-stick skillet, serrated knife, chef’s knife & cutting board, spatula, plate, spoons.

*With credit to the Video “Alton Brown Makes crêpes 3 ways l Good Eats l Food Network” by Food network on youtube.com; Erin Alderson’s Gluten Free Oat crêpes with Tomatoes, Basil, and Goat cheese recipe on naturallyella.com;, and “How to Fold crêpes” by wikihow staff on wikihow.com.

by Ava Morlier, Culinary Arts Writer

Happy July! These high temperatures call for a cool and fresh salad. Today’s recipe integrates creamy, fresh, and crunchy elements all into one salad: Creamy Parmesan salad. Easy to make (minimal baking required), rich and tangy (thanks to the dressing), well-flavored (sweet pear enhances the dressing, while the savory parmesan medallions and salty fried onions boost the savory side of the salad), and well textured (the many ingredients provide a myriad of crunchy, soft, and crisp textures). This salad will be sure to satisfy all your taste buds.

The base of the salad is easy to make: simply combine ingredients and dressing and toss together. The top of the salad is up to you to design! Want to make your salad fancy? Try fanning out slices of fruit and meat over the top of the salad; it will add restaurant-quality elegance to the overall aesthetic of your salad. Feel like scattering the toppings free-style? Go ahead! The salad is your blank canvas; any way you arrange the toppings, your salad will turn out delicious. Enjoy the fresh and creamy flavors of this salad and have fun making it.

Creamy Parmesan Salad

Ingredients

For the Cheese Medallions:

½ c. parmesan cheese

For the chicken:

1 chicken tenderloin

salt and pepper to taste

Oil

For the Dressing:

1 c. mayonnaise

½ c. sour cream

2 tbsp. milk

1 tsp. Worcestershire sauce

1 tsp. white wine vinegar

½ c. parmesan cheese

¼ tsp. garlic powder

¼ tsp. salt

½ tsp. pepper

For the Salad:

1 heart romaine lettuce

1 Asian pear

½ c. fried onions

½ c. croutons

Instructions

        Preheat oven to 350o. Line a sheet pan with parchment paper. Divide ½ c. cheese into 3 mounds, spread 2 inches apart from each other on the pan; press mounds into disks. Place pan in the oven and bake for 9 minutes or until golden brown. Take out and let sit for 5 minutes. Set finished medallions aside.

        Start a pan on medium heat. Add oil to the pan. Rub chicken with spices and cook (grill, saute, fry, or bake) until the inside of the chicken is no longer pink. Let sit for 5 minutes.

        Cut the chicken into strips and put in the refrigerator.

        Prepare the dressing: in the container, mix mayo and sour cream. Add the rest of the dressing ingredients and mix until well combined. Cover and refrigerate for later use.

        Prepare the lettuce: wash the lettuce in a salad spinner or rinse in a colander. Get out a new knife and cutting board.

        Cut the heart of romaine: take off the outermost leaves of the romaine and discard. Cut vertical strips down the length of the romaine. Then, cut thin horizontal strips through the romaine, so that thin strips of lettuce come off the heart. Place in a large bowl and repeat until 1 inch from the bottom of the heart of romaine. Put chopped lettuce in the refrigerator for later use.

Cut the pear: Get out a new knife and cutting board. Core the pear and cut the pear in half, laying the flat side of the halves on the cutting board. Cut half of the pear into slices and half of the pear into small cubes, making sure to discard the middle. Set aside.

Make the salad base: In a new large bowl, combine the chopped lettuce, cubed pear, fried onions, and croutons (if serving immediately; if not, omit fried onions and croutons and add both when salad will be served). Add ½ of dressing to the base (add more or less if desired); toss with tongs until dressing coats all the ingredients.

        Turn salad base onto a plate or bowl. Fan out chicken slices on top and artfully arrange cheese medallions, sliced pear, and fried onions on top of the salad base. Serve.

*With credit to Chef Liddick of CTC.

Tools Needed

Dry and liquid measuring utensils, parchment paper, small sheet pan, small skillet, bowl, medium container with spill-proof lid, fork, salad spinner or colander, 3 knives, 3 cutting boards, 2 large bowls, tongs, large plate or bowl.

by Ava Morlier, Culinary Arts Writer

Finally, May brings the warm weather we’ve all been waiting on! This winter was incredibly long. It was a great time to experiment with hearty dishes like chilis, soups, and stews. But with warmer temperatures, comes more fresh dishes that utilize the grill and other outdoor cooking techniques (like roasting over the fire). And, let’s not forget Memorial Day! A time to honor those in the military who died in combat and to celebrate our personal freedoms given to us from their sacrifices. Memorial Day offers the opportunity to exercise our personal freedoms as Americans, as we get to talk to friends and family about whatever we want, dress however we want (let’s hear it for shorts season), and grill whatever we want from the resources readily available from our grocery stores (you want 50 pounds of squid? Go ahead! Your personal freedoms allow you to do that!). Speaking of the famous Memorial Day BBQ, today’s dishes are great main and side dishes that compliment each other nicely: BBQ Pork and Mashed potato fries!

Sweet and tangy, complimented with crunchy and salty, these dishes are easy to make and delicious.

The mashed potato fries may seem confusing. Why go the extra length to make mashed potatoes and then fry them? Boiling the potatoes first ensures that the potatoes will be tender and not undercooked when in fry form. By adding cornstarch to the mashed potatoes, the fries can be more easily shaped (and customized into whatever shape you want) and handled.

Another ingredient that may be questionable is using Cola for the pork. Cola (surprisingly) makes a great marinade for pork. The acidity of the soda helps break down the meat, while the sugars in the soda enhance the sweetness of the BBQ sauce. Cooking the meat in cola also ensures that the meat doesn’t dry out and that it remains both tender and juicy. Enjoy your Memorial Day, flavorfully!

BBQ Pork & Mashed Potato Fries

Ingredients

For the Pork

1 pork shoulder

1 tsp. brown sugar

1 cup BBQ sauce (I used Sweet Baby Ray’s)

1 liter Cola (any brand)

¼ tsp. black pepper (more or less, depending on preference)

2 tsp. garlic powder (more or less, depending on preference)

2 tsp. onion powder (more or less, depending on preference)

1 tsp. salt (more or less, depending on preference)

For the Fries

2 potatoes

3 tbsp. cornstarch

Salt and pepper, to taste

1 cup oil (canola or vegetable) for frying

Salt (for after the fries are finished frying)

Optional: cheese, other seasonings (such as onion powder, garlic powder, or chives)

Tools Needed

Crock pot or dutch oven, liquid and dry measuring utensils, pan, bowl, spoon, knife, cutting board, peeler, medium pot (for boiling potatoes), strainer, bowl, mixer or masher, medium pot or fryer, large sheet pan (or clean surface), knife, rolling pin, pan/plate layered with a bed of paper towels.

Instructions

1.   Make the pork:

a. In the oven: Preheat oven 325o. Place pork shoulder in the dutch oven. Rub top and sides with dry seasonings; then pour half of BBQ sauce and cola on the pork (it should be covered in liquid; this will ensure the pork doesn’t dry out). Cover with the lid and bake in the oven for 2 hours.

b. In the crock pot: Place meat in a medium-heat crock pot. Rub top and sides with dry seasonings; pour half of BBQ sauce and cola on the pork (should be covered in liquid). Cover and let cook 4 hours.

2.   Once finished cooking (the meat should be easy to pull off with a fork), take out of the oven/crock pot and place on a pan. Take as much of the fat off as possible. Place meat in the bowl.

3.   Shred the meat, pulling against the grain. Once shredded, add the rest of the sauce and mix with a spoon. Serve on a bun or alone.

4.   Make the fries: Set water to boil in a medium pot. Peel and cut out the eyes of the potatoes. Dice the potatoes into small cubes.

5.   Place diced potatoes in boiling water and cook until soft, about 15-20 minutes. Strain once cooked and place in a bowl.

6.   Add salt and pepper (and desired other seasonings/ingredients) and mix/mash until potatoes have a smooth consistency.

7.   Add cornstarch and mix until cornstarch is well incorporated.

8.   Take the mixture out of the bowl (it should be the consistency of play-doh) and turn onto a clean work surface floured with cornstarch. Roll out to medium thickness; cut into long strips (you can shape the dough into shapes if preferred).

9.   Start a medium pot full of oil or a fryer on medium heat. Once hot, gently place fries into oil. Cook, flipping the fries after 1-2 minutes (or until golden brown).

10. Place finished fries on a bed of paper towels and salt immediately. Repeat with remaining uncooked fries.

11. Place finished fries on a plate/bowl and serve.

*With credit to With credit to Chef Liddick of CTC and user Kim’s Coca Cola Pulled Pork recipe on insanelygoodrecipes.org for ingredient proportions; information on how cola affects meat gleaned from How Soda Affects Meat, by Kim Grundy, PT on Livestrong.com.

by Ava Morlier, Culinary Arts Writer

Ah, Easter! The holiday everyone has been waiting for. The Easter dinner is all set up, everyone has brought a dish for others to enjoy, and everyone seems to be present. But, wait! What about the Easter Bunny? Isn’t he tired of the same old basic carrots? That’s where today’s recipe comes in: Carrot Cake Cupcakes!

Sweet, spicy, textured (thanks to the shredded carrot), and tangy (with a rich cream cheese frosting), this cake definitely gives carrots a good name.

Additionally, these carrot cake cupcakes are great for celebrations and Easter activities. Kids eagerly awaiting Easter can have a great time creating and decorating cupcakes with you. Easter Bunny meet-and-greets can be made all the sweeter with these small and portable cupcakes.

Enjoy creating these delectable cupcakes (whether alone or with a helper or two) and have a happy Easter!

Carrot Cake Cupcakes

Ingredients

For the Cake

1 c. all-purpose flour

1 tsp. baking powder

½ tsp. baking soda

¾ tsp. cinnamon

¼ tsp. ginger

⅛ tsp. nutmeg

¼ tsp. salt

¾ c. vegetable oil

2 eggs

¼ c. apple sauce

½ tsp. vanilla extract

¾ c. brown sugar

¼ c. sugar

1 ½ c. shredded carrots

For the Filling

4 oz (1 c.) cream cheese

½ stick unsalted butter

1 c. powdered sugar

½ tsp. vanilla extract

Green food coloring

Orange food coloring

Tools Needed

Liquid and dry measuring cups, 3 bowls, mixer and beaters, spatula, cupcake bag and liners, piping bag, tips, two small bowls, and two forks

Instructions

Preheat oven to 350 degrees.

In 1 bowl, combine flour, baking soda, baking powder, and spices. Mix until well combined.

In a separate bowl, combine oil, eggs, apple sauce, and extract. Beat until well combined. Add sugars and shredded carrot to the wet ingredients and mix until well incorporated.

Scrape down the sides of the bowl with a spatula; add the dry ingredient mixture to the wet ingredients mixture. Beat until everything is well combined, intermittently scraping down the sides of the bowl.

Line cupcake pan with liners (or grease the cake pan). Pour in batter.

Place in oven and bake 15-17 minutes or until a toothpick inserted into the center of the cupcake/cake comes out clean.

Meanwhile, make the frosting: Place butter and cream cheese in a bowl and soften them (the surface should give to pressure but should not be melted). Add sugar and extract and beat until smooth. Once done, take out and let cool.

Separate into 3 separate bowls: one bowl should have very little and the other bowls should split the rest of the icing equally. Put each color in a piping bag and fit with a tip.

In the bowl with the least icing, add green food coloring. In another bowl, add orange food coloring. One bowl should have completely white icing.

Icing the cupcakes: making sure the cupcakes are room temperature, pipe on (or put on with a knife) the white icing on the entire surface of the cupcakes (including the edge; this ensures the surface doesn’t dry out).

Pipe on an orange carrot (a simple triangle will work, but be as creative as you want!). Pipe on the green leaves at the top. Serve.

*You can also use candy to decorate the cupcake if desired.

by Ava Morlier, Culinary Arts Writer

Happy March! Miss the rich flavors of the holidays (Valentine’s Day and Mardi Gras)? Can’t wait for the delicious Easter Sunday dinner of next month? Today’s dish will let you be satisfied with waiting (while also being meat-free and rich): Fresh Ravioli!

It may seem like too much work for something so small, but homemade ravioli is much better than your classic restaurant entree. The fresh pasta alone will leave you wondering why you’ve been avoiding making it. The rich filling is also much more fresh when you make it, and it allows you to play with the flavor a bit more. Not a cheese fan? You can simply replace it with ground beef if you prefer!

Making ravioli is a work-heavy feat, so if you have a bored family member or interested child, invite them to help you make it! It’s a great way to bond and learn to cook together. Even the most novice chef can help!

May this rich and delicious ravioli bring you good times and warmth in this chilly month with your family, whether in the kitchen or in the dining room.

Fresh Ravioli

Ingredients

For the Pasta

2 cups all-purpose flour

2 cups semolina flour

1 pinch salt

6 large eggs

2 tbsp. olive oil

For the Filling

15 oz. (1 carton) ricotta cheese

2 cups shredded part-skim mozzarella cheese

1/3  cup grated parmesan cheese

1 large egg, beaten

2 tsp. minced fresh basil (or 1 tsp. dried)

1 tsp. minced fresh parsley (or ½ tsp. dried)

1 tsp. minced fresh oregano (or ½ tsp. dried)

¼ tsp. garlic powder

1/tsp. salt

1/tsp. pepper

oil

Tools Needed

Large sheet pan (to make pasta on), sifter, fork, bowl, wet paper towel, medium bowl, liquid and solid measuring utensils, spatula, pastry wheel/ravioli cutter, rolling pin or pasta roller, two spoons, large pot, bowl.

Instructions

Make the pasta:

On the sheet pan, sift flour, semolina flour, and salt together.

Make a well in the middle; add olive oil and cracked open eggs into the well.

Gently beat eggs with a fork, gradually adding more and more flour from the sides.

Once dough becomes thick, knead by hand until all ingredients are incorporated.

Knead the dough for 8-12 minutes or until smooth and elastic, gradually adding flour if the mixture becomes sticky.

Once kneaded, put in a bowl and cover in plastic wrap. Let rest for 30 minutes at room temperature.

Make the filling:

In the medium bowl, combine the ingredients for the filling, mixing well with the spatula.

Cover and refrigerate until ready to use.

Directions:

Once pasta has finished resting, fill the large pot with water and set to boil.

Divide the dough into four portions. Roll out one portion to 1/16 in. thickness on a floured surface. Put the other portions back in the bowl under a damp paper towel.

Take out filling.

On half of the pasta sheet, put rounded spoonfuls of filling 1 inch apart.

Fold the pasta sheet over so that the filling is covered by the pasta sheet completely.

Press around the rounds of filling so that the filling is sealed in. Cut into squares with the ravioli cutter. Set aside finished raviolis and repeat with remaining filling and dough.

Salt the boiling water. Add ravioli gently to the water one at a time and reduce heat so that the water is simmering.

Cook until the ravioli floats to the top, about 1-2 minutes.

Take out with a slotted spoon and place in a bowl.

Add olive oil to ensure the raviolis don’t stick together.

Repeat with remaining ravioli.

Garnish with fresh herbs, sauce, or cheese and serve.

by Ava Morlier, Culinary Arts Writer

Happy February! Today’s recipe will be celebrating the Lunar New Year (Happy Year of the Tiger): Egg rolls! An American take on an Asian classic (the traditional spring roll generally includes a vegetable filling and a thin wrapper; egg rolls, created by Asian immigrants to appeal to American customers, includes a filling of meat and vegetables and has a thicker wrapper). The egg roll is both versatile (the filling and flavor profile can change based on the whims of the chef) and delicious. It can also be the perfect appetizer for your Super Bowl feast. It’s small size and package-like form allows you to get a quick burst of flavor in a mess-free package. Enjoy making (and eating) these egg rolls.

Egg Rolls

Ingredients

For the Soy Sauce Reduction

¼ cup soy sauce

½ tsp. minced garlic

½ tsp. shredded ginger

2 tsp. sugar

2 tbsp. rice vinegar

¼ tsp. sesame oil

salt & pepper to taste

For the Filling

1 lb. pork or chicken

1 tbsp. oil

salt & pepper to taste

½ head of cabbage

½ onion

1 large carrot

1 clove garlic

½ pkg. rice noodles (or about 1 cup cooked)

8 egg roll wrappers

2 eggs

1 quart oil (vegetable or peanut)

Tools Needed

Small pot, medium pot, bowl, liquid and solid measuring utensils, knife, cutting board, medium pan, large pan, lid, steamer and pot (can use a traditional steamer or use a wire cooling rack over a pan of boiling water), large pot, large bowl, pastry brush, bowl, fork, wet paper towel, plate, 2 sets of tongs, plate, many paper towels.

Instructions

Fill a medium pot with water and set to boil. In the small pot, combine the ingredients for the soy sauce reduction. Bring to a boil and let simmer until thickened.

Once water is boiling in the medium pot, add rice noodles and cook for 5 minutes. Immediately strain afterward and place aside in a separate bowl.

Start a medium pan on medium heat. Add oil. Cook the meat until inside is no longer pink, about 5-10 minutes. Once cooled, finely shred. Set aside.

Cut the vegetables: dice the onion into thin strips. Finely cut the cabbage into very thin, long strips (making sure to remove the outside and innermost leaves). Cut the carrot into very thin carrot sticks. Mince garlic.

Start a large pan on medium heat. Oil and add onions, tossing to coat. Sweat them and allow them to cook 2-3 minutes.

Add carrots and place the lid on. Let cook for 5-7 minutes or until carrots are tender. Add garlic, then add cabbage and allow to cook until softened, about 3-5 minutes.

In the large bowl, combine rice noodles and meat. Add vegetables and soy sauce reduction. Mix well, making sure all ingredients are coated in reduction.

Add water to the large pot for steaming and set to boil on high heat. Add oil to a large pot and start on medium heat.

Make the egg rolls: Get out egg roll wrappers and a wet paper towel. Remove one sheet and cover whatever wrappers that aren’t being used with the wet paper towel.

On a clean workspace, place the egg roll wrapper on a plate. Brush sheet with egg wash.

Add 2 spoonfuls of filling, making sure not to add any 1 inch from the edges. Wet edges with water.

Roll to form a log; fold the edges inwards in order to seal off the sides. Repeat until there is no filling left.

Place in a steamer (or put on a wire cooling rack and put a lid over it) 5-10 minutes, flipping halfway through.

Gently place egg rolls in hot oil, flipping after 2 minutes (or until the side is brown). Take out once the entire roll is fried and place on a bed of paper towels.

Serve with soy sauce or preferred dipping sauce.

*With credit to Credit to Chef Liddick of CTC and Michele Urvater’s Soy Ginger reduction recipe on foodnetwork.com; history information gleaned from “Spring Roll vs. Egg Roll: What’s the Difference?” By Lindsay D. Mattison on Taste of Home

by Ava Morlier, Culinary Arts Writer

Today’s recipe is simple, yet elegant and delicious: Baked Brie. Baked brie marries together many flavors and textures in one delicious package. Creamy and savory brie is contrasted with the crunchy, salty flavors of the puff pastry. The sweet garnishes (honey, craisins) enhance the creaminess of the brie and contrast well against the savory puff pastry sheet.

This dish is also incredibly versatile. Have a pairing you prefer with brie? Use it as a garnish! Some alternative ingredients could include pear or apple slices, almonds, drizzling on balsamic vinegar (for a sweet, yet sharp contrast) or raspberry melba, or brushing the sheet with brown sugar. Or you could try using a different vehicle (instead of french bread) to get the melted cheese to your mouth, such as seasoned toast points or crackers.

Enjoy cracking open this delicious gourmet treat, and may the melty brie warm your soul during this long winter!

Baked Brie

Ingredients

1 triangle brie cheese

¼ sheet puff pastry

1 egg

⅛ cup honey

2 tbsp. Craisins

¼ cup walnuts

¼ loaf french bread

Makes 1 serving

Tools Needed

Small bowl, fork, pastry brush, parchment paper, small sheet pan, serrated knife, cutting board, dry measuring utensils

Instructions

Preheat oven to 4250.

Cut parchment paper to size on the sheet pan. Cut the loaf of french bread into thin rounds.

Place a puff pastry sheet on the prepared pan. Prep the egg wash.

Brush the inside of the puff pastry with the egg wash.

Place the triangle of cheese diagonally on the puff pastry sheet, so that the tip of the cheese is pointing at the top left corner and the round end of the cheese is facing the bottom right corner.

Fold the puff pastry around the cheese, slightly stretching the sheet. Make sure all holes are sealed (pinch the holes closed) and the cheese is completely covered by the puff pastry.

Egg wash the outside of the puff pastry. Place cut rounds on sheet and put in the oven.

Bake for 15 minutes (taking it off the pan after toasted, 3-5 minutes) or until the outside is golden brown.

Meanwhile, measure and prepare other ingredients.

Once finished, take out and let sit 5 minutes; move to a serving plate.

Immediately drizzle on honey and garnish with craisins and walnuts.

Serve.

*With credit to Chef Liddick of CTC

by Ava Morlier, Culinary Arts Writer

Happy December! Christmas is coming, and with it, the creation of many delicious pastries. Cookies-galore colorfully accent dessert trays and plates. Rich chocolates hide in tins and wrappings, and gingerbread fills many a kitchen with delectably spicy aromas. Today’s pastry, however, is unlike any other traditional Christmas pastry: angel food cake!

Light, airy, and simply flavored, angel food cake is a great alternative to the predictable and rich cookies and candy. However, it can still be decorated. It’s light color allows it to easily be changed by food dye (cool swirl effect with red and green dye, anyone?) or include colorful candies or sprinkles (crushed candy cane, gumdrops, or cut up pieces of the fabled sugar plums). No heavy icings needed; a simple glaze or drizzle elegantly flavors the outside of this cake.

Though making this cake involves great care (lots of whipping is needed), it will ensure that St. Nicholas will soon be there in your kitchen wanting a bite (the whipping incorporates air, which allows for the cake to be light and airy).

With a festive name and a versatility graced by delicate lightness (no cookies weighing your stomach down), angel food cake will soon become one of your Christmas favorites! Have a happy holiday, everyone!

Heavenly Angel Food Cake

Ingredients

1 ¼  cups egg whites at room temperature (about 10-12 eggs)

1 ½ cups sugar

1 cup cake flour (can be substituted with 1 c.- 2 tbsp. all-purpose flour and 2 tbsp. cornstarch, sifted together)

1 ¼  tsp. cream of tartar*

¼  tsp. salt

1 tsp. almond extract (you can use different extracts, if desired)

1 tsp. vanilla extract

*Cream of Tartar stabilizes the egg whites, ensuring that the cake does not collapse

Instructions

Preheat oven to 3500. Measure and set out egg whites. In 1 bowl, sift cake flour 2 times. Next, measure out and combine cream of tartar and salt. Combine with flour. Set aside.

Once egg whites are room temperature, put in another bowl. Whip egg whites until whites are frothy. Add extracts and mix.

Add sugar bit by bit, mixing well after each addition.

Whip until soft (going on stiff) peaks form.

Sprinkle small amounts of the flour mixture on top of the egg white mixture, folding with the spatula after each addition to incorporate. Repeat 4-5 times, eventually incorporating all of the flour (make sure not to overfold).

Fold in desired colors or sprinkles.

Pour into angel food cake pan or cupcake pan (Do NOT grease). Shake the pan slightly to ensure the batter is evenly distributed.

Place in the oven and bake until lightly browned on top, about 20 minutes.

Once cooked, take out and immediately flip the cake onto a plate (this is essential; it prevents the cake from collapsing). Let cool for 1 hr.

Garnish; cut with a serrated knife and serve.

Tools Needed

2 large bowls, fine mesh sieve or sifter, liquid and dry measuring utensils, beaters and mixer, spatula, angel food cake pan or cupcake pan.

*With credit to Amy Finley’s Gougeres recipe on Foodnetwork.com and Chef Liddick of CTC.

by Ava Morlier, Culinary Arts Writer

I’m also thankful for Thanksgiving as a holiday. It’s a great way for beginners to learn from the masters, cooking-wise.

A variety of cooking techniques and flavors ensure everyone can contribute and enjoy a Thanksgiving feast to the fullest.

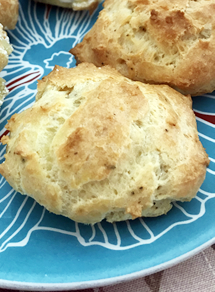
Today’s recipe is unlike the traditional dishes and side dishes of Thanksgiving and integrates a unique cooking technique: gougères.

Deluxe in nature, gougères are a great Thanksgiving accompaniment. Elements of gruyère and black pepper provide richness, while the puffy nature of the pâte à choux allows the gougères to be deliciously delicate and airy (not weighing down your stomach like most dinner rolls).

Additionally, the base of the gougères  (called pâte à choux) is easy to make and is utilized for many pastries (such as cream puffs and eclairs). It is the key element in ensuring that the gougères are soft but delicately crunchy.  Your in-laws will be impressed and begging for more! Enjoy your Thanksgiving deliciously, and have fun cooking up a storm!

Gougères

Ingredients

1 c. water

1 stick butter

2 tbsp. sugar

1 c. flour

3 eggs, pre-cracked in separate bowls

¾ c. grated gruyère (can add more if preferred)

1 tsp. salt

½  tsp. black pepper

Instructions

Preheat oven to 375 degrees.

Heat water on medium heat in the pot until warm. Add butter and cook until melted.

Once melted, add flour and mix well. It should form a clumpy paste. Cook 1-2 minutes in order to cook out the flour.

Move mixture to the bowl. Mix with a mixer in order to cool the mixture down for about 1-2 minutes.

Once cooled, add eggs one at a time. Mix well after each addition.

Add grated cheese, salt, and pepper to the mixture; mix until well incorporated. Intermittently scrape down the sides of the bowl.

Layer the sheet pan with parchment paper. Pipe or spoon 1-inch rounds onto the pan, 2 inches apart.

Put in the oven and let cook for 20-25 minutes, or until golden brown and puffed.

Take out of the oven and put on the cooling rack. Cut open with a serrated knife while warm. Let cool and serve.

Tools Needed

Medium pot, (optional) cheese grater, solid and liquid measuring utensils, mixer and beaters, bowl, fork, piping bag or 2 spoons, small bowl, parchment paper, large sheet pan, serrated knife, cooling rack.

*With credit to Amy Finley’s Gougeres recipe on Foodnetwork.com and Chef Liddick of CTC.

by Ava Morlier

Happy October! Since the holiday of this month provides many sweet flavors (halloween candy, anyone?), today’s dish is savory and warm (to fight the coming chilly temperatures): rice pilaf.

Though pilaf can seem pretty basic, its basic nature allows this dish to be versatile and easy to make. No constant incorporation of liquid is needed (much unlike a risotto); the toasted rice (providing a richer flavor) is added to liquid all at once. Today’s recipe plays up the versatile nature of the dish, taking flavor cues from Mediterranian tastes. Ingredients such as curry powder (provides a subtle flavor boost to the dish, perfect for those wanting to try a traditional pilaf dish but aren’t fans of regular curry), golden raisins (adds elements of color, chewiness, and sweet contrast to the mainly savory flavors of this dish), and the addition of chopped cashews (brings a boost of texture and a slightly sweet creamy flavor) may seem different, but provides a powerful flavor punch that boosts this dish from mundane to mouthwatering.

Enjoy your October, and may this dish warm you and your family in these increasingly colder days!

Rice Pilaf with Raisins and Veggies

Ingredients

3 cups chicken broth

2 tbsp. butter or olive oil

4 stalks celery

½ large onion

4 green onions

3 cloves garlic

1 tbsp. curry powder

½ tsp. salt

1 ½ cups rice (white or brown)

½ c. golden raisins

¼ cups chopped cashews (optional)

Instructions

Put the pot on medium heat and add chicken broth; let simmer. Heat pan on medium heat. Wash and chop celery, onion. and green onions (divide the green and white parts and chop); mince garlic. Measure out rice and set aside.

Once the pot is warm, melt butter (or add oil). Add celery, white part of green onion, and onion to pan; season with curry powder and salt and cook until tender (5 minutes). Add garlic and cook until aromatic (10 seconds).

Take vegetables out of the pan and set aside. Turn heat down to medium-low. Add rice to pan and let cook until lightly toasted (3 minutes). Make sure rice is evenly distributed throughout the pan in order to ensure every grain is toasted and not burnt.

Once toasted, add to simmering chicken stock. Turn heat down to medium-low. Let cook for about 15 minutes, or until all liquid is absorbed by the rice. Take off of the heat.

Add vegetables, golden raisins, and the chopped green onion tops. Stir until well combined; serve.

Tools Needed

1 large pot, 1 skillet, spatula, cutting board, chef’s knife, liquid and solid measuring utensils, spoon, fork, medium bowl.

*With Credit to Jaquine’s Rice Pilaf with Raisins and Veggies recipe on allrecipes.com.

by Ava Morlier

Happy September! Today’s dish will be celebrating the rich culture and flavors of Oktoberfest: Soft pretzels!

Brought to America by German immigrants, the soft pretzel carries great German history with it. Used as a symbol of prosperity and good luck, pretzels were enjoyed by both the rich (used as a symbol for undying love for aristocratic couples) and the poor (monks baked and distributed pretzels to those living in poverty). Today, the pretzel reaches many audiences as well, both culturally (enjoyed by Americans and Europeans) and flavor-wise (can be customized with both sweet and savory seasonings, thanks to the minimally-flavored dough).

Pretzels are relatively easy to make, and you can customize them with the flavor of your choice. One step of this recipe may be confusing: boiling the pretzel in baking soda. Why? Boiling the pretzel gives it the puffy shape, and the baking soda gives the pretzel its iconic brown outside. Though it takes a bit more time than simply folding and baking the pretzel, the outcome is worth it: a soft, iconically brown pretzel.

Enjoy your Oktoberfest! May these soft pretzels indeed grant you luck and prosperity, and Ein Prosit der Gemütlichkeit!