Currently viewing the tag: "The Gardening Gangster"

  by Ana Morlier, The Crazy Plant Lady

The Crazy Plant Lady’s Gift-Giving Guide

Now that we’ve gotten our first taste of connecting with relatives over the Thanksgiving Day holiday, it’s time to prepare for round two! As the 25th of December draws near, we all find ourselves scrambling to find presents for those family members who can’t decide on what they want for Christmas or are hard to buy for. So, why not buy them the gift of kin? In the cold season of exterior plant decay, give them an indoor plant to keep them warm all year. ‘Tis the season of gift giving, and here is my guide to bring cheer to you and the gift recipient. Here are my top favorite plant-related gifts! Some items on my list may or may not be a subtle hint of my Christmas list for my own family.

Best Homemade Gifts

Who says garden stakes are just for the outdoors? Create your own with markers or paint; draw animals, fun designs, or even memes!

Flower pots are the best gift to personalize! Color the exterior with markers, paint, duct tape, or other mediums. Personalize it with a kind message or drawing.

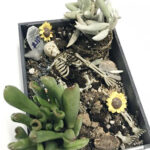
Create a magical scene using succulent plants to act as shrubs or trees! Materials you may need include a large container (such as a stockpot or plastic tub), dirt, succulents (the more colorful the better), small furniture, fairies or toy figurines, gravel, pebbles, sand, and other accessories of your choosing!

My Favorite Practical Gifts

Spray bottles. A backup spray bottle is always helpful. I have a spray bottle for plants on each level of my house! Spray bottles disperse moisture much better than traditional watering cans do and present ease of use.

Plant Scissors (regular scissors will do as well). These are nifty for deadheading flowers or decayed leaves. Gardeners will be less likely to accidentally deadhead lilies with their pizza scissors!

Gloves. Everyone could use more garding/planting gloves.

Potting Soil. Potting soil is perfect for gardeners who like to buy new plants for projects or start new seedlings.

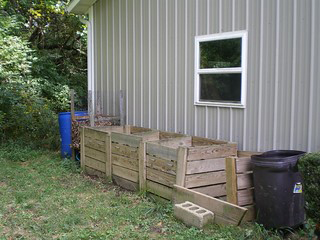
Composter. These can get pretty expensive, so shop with caution.

Hedge clippers. Every gardener’s must-have.

Self-watering planter. A self-watering planter is perfect for all gardeners, no matter their experience level. Even experienced gardeners need a break from watering their plants!

Gift cards to local nurseries. These can help support plant life and local businesses while letting gardeners purchase the new plants they want.

Plant subscription boxes. Plant subscription boxes expose gardeners to new plants that might not be common at the local plant store. Succulents Box is the best subscription for those on a budget, and The Sill provides plants and resources for budding gardeners.

My Favorite Plants…That Thrive Even In the Care of a Non-Green Thumb

Mother of Millions. Mother of Millions is a prosperous succulent that grows quickly, looks impressive, and can grow despite neglect.

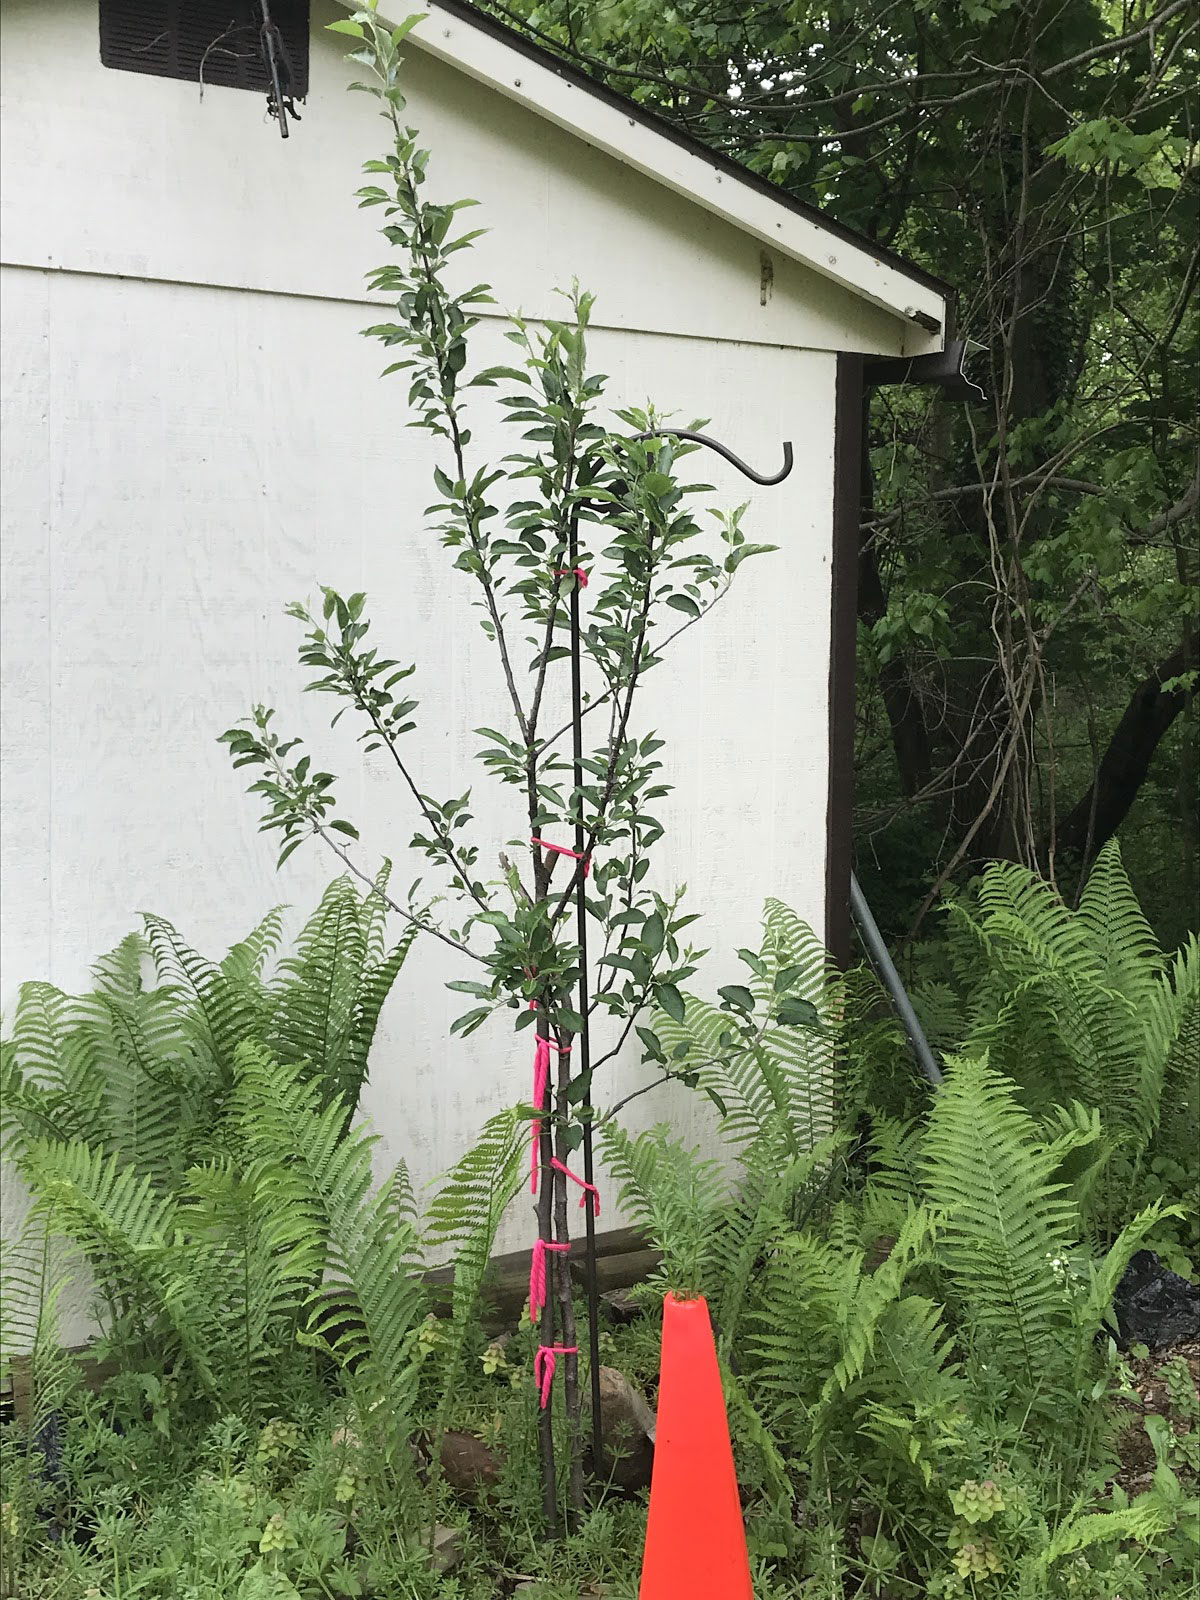
Fern. Ferns are elegant plants and survive well in low-light conditions.

Calathea plants. Calathea plants prosper in low light and are unique with their striped leaves (sometimes tinged with white or pink) that look festive no matter the season.

Aloe plant. Aloe is an extremely tough plant to harm. It appears chic in any container you put it in and helps soothe burns, acne, and itchy skin.

Spider plant. Spider plants are luscious, decorative plants that produce many seedlings in a short span of time. I’ve found that they are easy to revive if neglected (just by watering normally) and survive even in the colder temperatures of one’s house.

Air plants. Air plants can be found by themselves or in whimsical containers at most gardening stores. These plants scarcely need any water or much attention and look funky in any decorative container you put them in.

Bamboo. Lucky bamboo requires only a container, rocks (as a base), distilled water, and low light to survive. They make lovely table centerpieces and ship on Amazon.

Now that you are armed with this list and a budget, I hope your gift-giving is successful! Another wonderful present to give to others is your presence. Take time to celebrate the season not just for the gifts, but for each other’s company—now that we can all appreciate it again. May your Christmas be filled with joy, kinship, and, most importantly, PLANTS!

Credit to Dacey ORR of The Spruce, Kayla Fratt of PlantSnap, and Lauren Ro of The Strategist. Thanks to the staff of The Catoctin Banner and the readers for this one-year anniversary of my first article!

A humble fairy abode is pictured surrounded by succulents.

Spooky Succulent Garden

by Ana Morlier

Happy October, everyone! Looks like it’s time to put down the pumpkin-spiced lattes and pull out your next great costume. The season of free candy, spooks, and transforming into your favorite character is upon us!

Halloween is drawing closer and closer, with its anticipation following close behind. Even though the status of trick-or-treating may be uncertain, there is one fun activity that we can all take part in: decorating!

Jack-o-lanterns, ghosts, and talking animatronics seem to be standard decor these days. It seems difficult to make a statement when pretty much everyone has a talking head on their lawn. It’s also difficult to stay family-friendly. Having your favorite horror movie characters seemingly alive on your lawn sounds great in theory. However, it’s not as fun when you have a dozen laughing clowns scaring your trick-or-treaters away (with angry parents in tow). Likewise, just when you have admired your work of angling your projector just right, you have to change out your decorations for cornucopias. October seems to come and go so quickly!

Luckily for you, reader of the Banner, I have come upon a decoration that is sustainable, family-friendly, and spooky!

Here’s a list of what you will need for your Spooky Succulent Garden:

Small wooden coffin box or a rectangular wooden box (preferably, small; can be found at the Dollar Store. You may need to paint your coffin!);

Your favorite succulents [Try these to set a spooky mood: Black Hens and Chicks, Black Zebra Cactus (Haworthia), Chocolate drop stonecrop, Zwartkop, Arachnacantha, Black Knight, Black rose, and Living Stones];

A mini skeleton (or one to fit your coffin. You can also hot-glue dried pasta together to form a convincing skeleton);

Potting Soil;

Cardboard or paper;

Hot glue gun or duct tape;

Your favorite Halloween music (Thriller, anyone?).

Step 1

Paint your coffin, if desired. Fill your coffin about three-quarters of the way full, leaving room for your succulents.

Step 2

Lay your succulents to rest (in the coffin)! Position your plants however you want, just keep in mind that you will need to put your skeleton in the coffin, preferably unobstructed. Try to place a small to medium-sized succulent near the head of the coffin. You can also add a visitor by adding googly-eyes to an Old Man Cactus and planting it off to the side.

Step 3

Slightly bury your skeleton in the dirt. Cut out your paper/cardboard to look like a mini tombstone. For ease in placement, tape or glue your (colored) piece of paper to the cardboard shape, as this will also act as a better garden stake. Make sure you cut your cardboard longer than the piece of paper so that your tombstone stays deep in the dirt.

Step 4

Add whatever you wish to your spooky scene! Some ideas include air plants as your skeleton’s hair, integrating living stones as stepping stones (or other pebbles), or adding another skeleton (Do I see an arm-wrestling match in the near future?).

You can use the skeleton idea on a larger scale. A skeleton waving at guests from your garden will provide quite a bit of surprise. If you properly seal a skull or adhere it to a flowerpot, you have an eerie planter!

While your coffin planter may seem puny in comparison to your neighbor’s life-sized werewolf animatronic, it will startle your next party guest and stay around all year-round. With flowers out of season, this decoration will make a chilling,  yet festive, centerpiece for your table.

May all your plants protect you this Halloween!

by Ana Morlier

One Person’s Trash Is Another Worm’s Treasure

All About Composting

Happy August, everyone! While we are still melting in the heat, we are nearing a time of cool air and beautiful leaves. I know it’s quite early to reference fall; however, there is a major aspect of gardening that should be considered before the leaves pile up. In fact, you can even start now with lawn clippings. What is this activity? Composting!

While it may not seem desirable at first…“food scraps and plant waste sitting in a bin, right? It’s just as bad as the trash, and it can’t be taken out!” Yet, there actually are many beneficial factors to consider.

First of all, I wish to dissolve the misconception that compost smells. If done correctly, compost should not smell or have rotting or moldy materials in it.

Second, compost cuts down on carbon emissions cost, landfill size, prevents plant diseases and pests from penetrating, and generally helps your dirt to be healthy, among other benefits.

Not everything is compostable. Meat, fish, bones, dairy products, oil, bioplastics, invasive species (of plant), moldy/infested plants, chemicals and/or pesticides should NOT be composted. Not only do meat products attract animals to your compost (and possibly your garden), they do not break down easily. The rest will cause compost to become moldy or harmful if you choose to use compost in your garden (or wherever you decide to put it, for that matter).

What can be composted must be in balance. These are termed as “browns” and “greens.”

“Browns” are hard, dry, and carbon-rich. They are tougher materials, add structure to the pile, and prevent the stench, thus preventing any bugs or critters from coming by. None of the materials listed below should be used if they have been soiled in any way. For example, while cardboard is on the list, you should not use pizza boxes, as all the oil and cheese residue will rot the pile.

“Browns” include:

Paper (napkins, plates, newspaper, parchment paper, toilet paper, tissues, office paper, and junk mail, unused and NOT glossy);

Wood chips (untreated by chemicals);

Sawdust (untreated by chemicals);

Cardboard (egg cartons)

Hey, use hay! (and straw);

Pine needles/cones;

Corn stalks/cobs;

Woody nut shells (these take longer to break down; to combat this, blend them in a food processor or crush them—there is nothing more satisfying than seeing peanut shells turn into dust!).

“Greens” are wet materials, allowing microorganisms to break down materials quickly. They provide the right sugars and proteins for the growth and reproduction of microorganisms.

“Greens” include:

Feces can be used, but only add feces (minimally) from herbivores to get the duty done (yes, I know, manure);

Tea bags/coffee grounds;

Fruit and vegetable scraps;

Trimmings from plants (weeds included, as long as they haven’t set seed);

Plants, themselves;

Grass clippings;

Leaves—jump in that pile, then put it to good use when fall arrives;

Seaweed (you are lucky if you have some—it’s nutrient-rich, and it might mean you live by the ocean).

A good ratio to keep in mind is two browns to one green. But, if you are in doubt, it’s always safer to add more dry materials than for mold to set in. Make sure to stir your compost on a regular basis because microorganisms break down the compost as they are exposed to more oxygen and as the compost is turned. This can be done with a shovel and/or a compost turner. Heat also makes the composting process occur faster.

The formula: Food+Water+Oxygen+

Heat+Structure+Time = The Perfect

Compost.

You can buy a compost container or make your own—whether it is made from a plastic bin, wood, wire mesh, or palettes is up to you! As long as it is covered to prevent animals from coming by. Finally, keep in mind the composting process can take quite a while. 

I hope you are inspired to become a force of composing and try it out for yourself. Be sure to hang up the list of browns and greens somewhere you can see on a daily basis. While composting may seem degrading at first, if put into practice and done correctly, it can be good for the soul and the soil. Good luck!

This is a wonderful picture example of homemade compost bins made of wood. Not only does it provide the perfect composting conditions, but it also looks stylish!

Photo Credit: Composting by Jen Waller

by Ana Morlier, The Crazy Plant Lady

Fruiting Shade Trees

Happy June, everyone! I know that I will really start celebrating the month after this crazy school year ends. Crops are thriving. Vacations are beginning. However, one drawback to this awesome month is the beginning of the HEAT. To think that I hovered near any available heat source like a mayfly only a couple of months ago makes me laugh, then sweat. I will soon cling to fans and turn the house into an arctic tundra.

Being a gardener, we can only stay in cool areas for so long—the plants need tending to! One can definitely take preventative measures against the upcoming summer heat by drinking plenty of (cold) water, taking breaks, and wearing a hat. If you have a pool to cool off with, even better! However, not all of us are lucky enough to have the right conditions for a pool (we have too much wildlife eager to destroy the watery refuge). I present to you a solution that will yield produce and give you relief from the heat: shade trees! And, not just any shade trees: FRUITING shade trees! I was pretty surprised that fruit trees could check off both requirements, which made a great combination.

Apple trees are some of the best shade trees. Ap-peal-ing options include:

Early harvest apple (as the name suggests, some yield fruit as early as June! Even if it’s not early, you can enjoy the juicy, tart apple at the end of September at the latest).

Red Delicious Apple (a pretty famous apple variety—great for applesauce; harvest in fall).

Yellow Delicious Apple (IMPORTANT to cross with other tree varieties such as red delicious or red Jonathan; great for pies!).

These apple varieties grow pretty quickly—an added bonus.

Here are some other fruits that apri-caught my eye:

Apricot trees are surprisingly tolerant of cold. They are also self-fertile, but it’s a pretty good idea to plant another variety of apricot nearby (more produce).

The early golden apricot can produce fruit as early as July or August. The fruit is great for fresh eating, baking, canning, or drying.

The Moorpark Apricot is pretty much the same, except for the fact that the fruits ripen at different times. To make up for this fact, it has beautiful white-pink flowers that bloom in spring—a little late, I know, but I couldn’t leave out this fact!

Still not pear-y happy with apricots or apples? Pear-haps you should try pears!

Bartlett pear trees are rumored to be pretty easy to grow, producing fruit in late summer. They also have blooms in spring.

The Harvest Queen pear is even more pear-fect because it yields produce earlier than that of the Bartlett pears and is resistant to blight! Another variety of pear tree is needed in order for it to produce fruit.

I hope these shady (not sketchy) trees become the apple of your eye and provide you with a cool haven with lots of tasty produce!

*Credit to Arbor Day Foundation, Specialty Produce, Davey Tree Expert Company, North Carolina Extension Gardener Plant Toolbox, Shari’s Berries, Punopedia, Punstoppable, Best Puns.

My own Liberty apple tree (one of two). Even though it wasn’t mentioned in the article, I wanted to illustrate how fast a young sap could grow! In the fall, it was half the size and close to death. Liberty apple is one of the best disease-resistant varieties and is great for eating fresh and baking. Liberty ripens in mid-to-late September and stores well until January.

by Ana Morlier, The Crazy Plant Lady

Butterfly Bushes: What’s the Buzz About?

As I was researching the butterfly bush (rather excitedly), I came across a fact that stopped this article in its tracks. It turns out that the butterfly bush (Buddleia davidii) was imported from China. Because of this, there are no native species in the U.S. to keep its population and growth under control. In other words, it’s crazy invasive. It can be toxic to some organisms, and spreads aggressively, not allowing other plant life to grow. What incarnation? I don’t think any’bud’y saw that coming.  So, I turned my eyes toward beneficial plants that host butterflies!

As much as flowering plants can be beneficial to pollinators, most don’t “host” life, especially for butterflies. This means they don’t support the life cycle of butterflies (growth, reproduction, etc.).

I feel like the milkweed plant (asclepias) is a pretty common and well-known host plant. However, I never really knew that there were flowering varieties as beautiful as the ones listed below. Most milkweed plants are also (surprisingly) deer resistant! They are especially appealing to monarch butterflies. Other organisms, such as honey bees and hummingbirds, also flock to these plants.

Asclepias Tuberosa: Fiery orange flowers, any variety of sun. Tolerant of dry, drought-like conditions.

Asclepias Tuberosa (Clay form): Lighter orange flowers, full sun, crown-shaped flowers, any soil condition.

Asclepias Hello Yellow: Don’t you just love the name? Golden flowers, full sun.

Asclepias Incarnata Cinderella: Also known as Swamp Milkweed. Pink flowers, requires full sun, claimed to have a vanilla scent.

Asclepias Incarnata: Also known as Ice Ballet (how majestic!). Tiny, delicate white flowers. Any variety of sun. Fragrant.

Common herbs and vegetables can also host butterflies, including alfalfa, rue, parsley, fennel, dill, and sunflowers. (Known to attract painted lady and black swallowtail butterflies).

Hopefully, this article will encourage you to put the “petal” to the metal (as in your shovel), and start a new, beneficial home for butterflies!

*Credit to The Farmer’s Almanac, Butterfly Identification, Maryland Manual On-line, Finding Sea Turtles, Butterfly Lady, Punpedia.

Photo Courtesy of Britannica ImageQuest, Encyclopædia Britannica

by Ana Morlier, The Crazy Plant Lady

Dear Gardening Gangster,

I have some succulents that I need advice on caring for. My house (during the winter) is warmed by a woodstove—a dry heat source. The leaves are falling off one of my succulents. The stem is still green, but the top is coming off. My other succulents still seem to be doing great and are growing new leaves. Any advice would be helpful.  ~Sincerely, Faith in the Succulents

Dear Faith in the Succulents,

Wow, it sounds like you’ve got a lot on your trowel! Luckily, there are many ways to get your succulent back to health. Just like any patient at the doctors, succulents have many symptoms that can arise from a single problem. Here are some signs and symptoms as well as their solutions!

Signs of Overwatering

Leaves falling off

Mushy leaves

Sitting water (at the bottom)

Yellow leaves

Shriveling, limp leaves

Puffy stem

Misshapen leaves

Solution: If you are overwatering your plant, stop watering it and let it sit until the topsoil layer is completely dry. Then water it once every two days or once a week. Another problem may be drainage. Integrate pebbles or rocks into the soil or drill in drainage holes. 

Signs of Underwatering

Extremely dry soil

Yellow leaves

Shriveled leaves

Solution: Water your plant as normal, every two to three days or once a week.

Other Problems

Extreme heat. For this, move your plant to party in a shady, cool location with partial sun. Humidity isn’t as much as a problem, as succulents originate from a very dry, arid climate. They will survive! If you are worried, look to my last article for easy humidifier solutions. A wet sponge is the easiest one to use. Sure, I’ve forgotten to re-wet it to a point where it is drier than succulent soil, but in a matter of minutes, it’s soaked again.

Lack of nutrients. The easiest option is just to repot it in new soil, but that isn’t any fun! When you make your own, you can save money to buy even more succulents! (Or, whatever else you want to use it for, of course.)

Coffee grounds: This will provide a tasty drink for you and nutrients for your plant. I’d be lying if I said it didn’t make everything—the house, plant, and my hand—smell amazing.

Garden “teas”: I hope you were able to enjoy drinking the fruits of your labor from my previous column about teas. It’s time to pay your plants back by giving them a tea of their own.

To make this garden tea, you must soak leaves (usually of weeds) in a bucket of water for a month. Common weeds can be used, but the most effective ones include comfrey, nettle and horsetail. Put rocks over the leaves so that they sink to the bottom and properly brew. WARNING! This does not smell pleasant—with comfrey being the worst offender to the nose. Make sure you put a lid or covering over it, so it doesn’t stink and so no critters start calling it home. You could also spray pungent essential oils (mint is one of the best ones to use) on the lid to attempt to cancel out the smell. As long as the water doesn’t freeze, the temperature of the tea does not matter (iced tea may be tasty for us, but it doesn’t bode well for plants).When you are done, strain out all the leaves and bugs (if any). Serve your planty friend the tea, diluted with water, and it will thank you, even if it can’t say anything! Make sure not to over-fertilize your succulent. With too much water, nitrogen, phosphorus, potassium, and other nutrients, the plant may suffer the same symptoms as listed above. Trying to keep your plant alive is definitely a balancing act. With succulents it can be a little easier, but problems still arise, which is completely normal

“Helping You Find Plants That Work”

by Ana Morlier    , The Crazy Plant Lady

Looking for another aspect of your life in which to interject the holiday spirit? Try the Christmas cactus! It’s actually a pretty low-maintenance plant. Other cacti in the Cactaceae family also have holiday names: the Easter cacti and the Thanksgiving (or crab) cacti. Because of our instantaneous consumer market, people are more likely to end up buying a Thanksgiving cacti or a hybrid of the Christmas and Thanksgiving cacti, which blooms much faster.

Holiday Cacti — How Can You Tell the Difference?

These cacti bloom according to the season. If it blooms in fall and perks up when you watch the Macy’s Day Parade, it is a Thanksgiving cactus. A Christmas cactus has rounded or scalloped “teeth” or edges with lots of ornaments on them (not true, but you could deck out your cactus with holiday garland and the like, if you want!). Thanksgiving cactus’ leaves are jagged. The Easter cactus has very rounded edges, which are centralized on the leaf.

Contain Your Excitement

While you may think you need to put such an exotic plant in a greenhouse, this cactus thrives indoors. They are great container plants; however, to maintain the nutrients of the soil, replanting every two years is necessary.

The perfect planter pot can honestly be anything (well, not Fido, for example), as long as the plant can receive sunlight and the soil can be well-drained. You can get a traditional pot, or maybe an unused bin or something funky—like a cookie tin—to make a statement. I almost bought a high heel as a planter, but a child’s galosh could hold more soil. When looking for a container, make sure there is enough volume for the cactus to expand as it grows (usually about 3-5 inches deep, with a width of 1-2 feet). If you want to save money on containers, thrift stores such as Goodwill come in handy.

The Dirt on the Christmas Cactus

Rocks and pebbles at the bottom of the container help drain the soil so there isn’t an excess of water. This can cause fungal problems for the root of the plant, leading to a slew of horrifying diseases. Believe me, when examining a bunch of gardening books, there are always a disease-troubleshooting section with everything from aphid attacks to powdery mildew. After that, I was way too overprotective of my plants, leading to the death of a zucchini plant. If you’re cheap like me, you can find small pebbles at the dollar store. Mulch also helps to drain soil, and you can find it for free at any playground (just kidding. Please do not use mulch from public property. While it causes so many splinters and cuts, it still provides some safety for children.). You can find mulch (and most likely stones) at local hardware, gardening, and feed stores.

Soil exclusively for succulents can also be found at home improvement stores. This specialty soil is sensitive to the shallow root structures of the plant. If you don’t want to fork over your paycheck for a few measly pounds of dirt, you can make your own (for dirt cheap! Pardon the pun) by mixing pebbles or pea gravel with potting soil.

Here Comes the Sun

Grow your cactus friend in indirect sunlight, in cooler temperatures (50-55 degrees is enough to coax out beautiful blooms). Make sure that your plant doesn’t get too little sunlight. It will still grow, but the leaves will become weak and the blooms not as apparent. I know that I mentioned earlier that it would be pretty easy to grow, but there are a lot of conditions to be met to ensure your little buddy keeps thriving. Hang the plant up to encourage more growth. It can make the room look more tropical, which is great in such a dreary winter season.

I Say Let It Grow!!

Now, you can rest on your laurels and wait for it to grow! In terms of watering, keep the soil moist. You can check this by sticking your finger into the dirt. Your plant will start to shrivel up and, well, you guessed it, die, when it is too dry. I recommend watering it once every two days, more or less, depending on the condition the soil is when you touch it. Remember, over-watering causes fungal problems, so don’t soak the soil to the bottom. As long as the upper layer of soil (about ¼ inch) is moist (NOT soaked), your plant should stay healthy. Cut off the dead leaves to encourage new growth.

It can take up to eight months for flowers to bloom, but colors come in purple, red, orange, white, pink, and yellow—red or pink is the most common.

The best part of this plant is that it’s the gift that keeps on giving (perfect for the Christmas season, eh?). A mere clipping will expand significantly.

As much work as it sounds like to keep this plant alive, it is well worth it in the end. While you can’t garden outside in such cold and dreary conditions, you can take the party inside and liven up your life!

Merry Christmas (Cactus)!

*Credit to Better Homes and Gardens, Encyclopedia Britannica, The Old Farmer’s Almanac, The Spruce, and Martha Stewart.